chef adding nodes

Chef is a powerful configuration management tool that turns infrastructure into code. With the help of Chef, Users can easily manage, configure and deploy the resources across the network from the central location of the environment (cloud, on-premises, or hybrid).
System Requirements
Os CPU Ram Hdd Purpose
centos7 4 4 50Gb Chef server
centos7 1 2 10Gb Chef Workstation (Chef Development Kit)
CentOS 1 2 20Gb Chef Client
PREREQUISITES
The host should have a Fully Qualified Domain Name (FQDN)
Install & configure the Network Time Protocol (NTP) to prevent clock drift for different OS platforms.
Disable the Firewall & Selinux.
#systemctl disable firewalld
Removed symlink /etc/systemd/system/multi-user.target.wants/firewalld.service.
Removed symlink /etc/systemd/system/dbus-org.fedoraproject.FirewallD1.service.
# systemctl stop firewalld
# systemctl status firewalld
● firewalld.service - firewalld - dynamic firewall daemon
Loaded: loaded (/usr/lib/systemd/system/firewalld.service; disabled; vendor preset: enabled)
Active: inactive (dead)
# vi /etc/selinux/config
# This file controls the state of SELinux on the system.
# SELINUX= can take one of these three values:
# enforcing - SELinux security policy is enforced.
# permissive - SELinux prints warnings instead of enforcing.
# disabled - No SELinux policy is loaded.
SELINUX=disabled
# SELINUXTYPE= can take one of three two values:
# targeted - Targeted processes are protected,
# minimum - Modification of targeted policy. Only selected processes are protected.
# mls - Multi Level Security protection.
SELINUXTYPE=targeted
Should have DNS or Host entry in place.
# cat /etc/hosts
127.0.0.1 localhost localhost.localdomain localhost4 localhost4.localdomain4
::1 localhost localhost.localdomain localhost6 localhost6.localdomain6
192.168.1.30 chefserver.zippyops.com
192.168.1.24 chefdk.zippyops.com
192.168.1.25 chefclient.zippyops.com
Reboot the machine after disabling the Selinux and then install the wget package.
#yum install -y wget
CHEF SERVER (INSTALLATION & CONFIGURATION)
Download the Chef Server from the below link https://downloads.chef.io/chef-server. Select the recent releases for the server.
Now, login to server as root user, navigate to /opt folder and create a “chef” directory.
#mkdir /opt/chef
#cd /opt/chef
#wget https://packages.chef.io/files/stable/chef-server/12.17.33/el/7/chef-server-core-12.17.33-1.el7.x86_64.rpm
# ls
chef-server-core-12.17.33-1.el7.x86_64.rpm
locate the rpm package and run the following commands.
# rpm -Uvh chef-server-core-12.17.33-1.el7.x86_64.rpm
warning: chef-server-core-12.17.33-1.el7.x86_64.rpm: Header V4 DSA/SHA1 Signature, key ID 83ef826a: NOKEY
Preparing... ################################# [100%]
Updating / installing...
1:chef-server-core-12.17.33-1.el7 ################################# [100%]
Once the installation is complete, run the reconfigure command, which configures the components that make up the server to work together in the specific environment:
#chef-server-ctl reconfigure
Starting Chef Client, version 14.8.12
resolving cookbooks for run list: ["private-chef::default"] Synchronizing Cookbooks:
- enterprise (0.10.0)
- apt (2.9.2)
- yum (3.10.0)
- openssl (4.4.0)
- chef-sugar (3.3.0)
- packagecloud (0.0.18)
- runit (1.6.0)
- private-chef (0.1.0)
Installing Cookbook Gems:
Compiling Cookbooks...
[2018-12-20T02:38:37+00:00] WARN: Chef::Provider::AptRepository already exists! Cannot create
deprecation class for LWRP provider apt_repository from cookbook apt
Chef Client finished, 394/459 resources updated in 04 minutes 05 seconds
Chef Server Reconfigured!
# chef-server-ctl status
run: bookshelf: (pid 1125) 114s; run: log: (pid 1124) 114s
run: nginx: (pid 1149) 114s; run: log: (pid 1148) 114s
run: oc_bifrost: (pid 1120) 114s; run: log: (pid 1115) 114s
run: oc_id: (pid 1122) 114s; run: log: (pid 1117) 114s
run: opscode-erchef: (pid 1136) 114s; run: log: (pid 1135) 114s
run: opscode-expander: (pid 1119) 114s; run: log: (pid 1118) 114s
run: opscode-solr4: (pid 1121) 114s; run: log: (pid 1116) 114s
run: postgresql: (pid 1132) 114s; run: log: (pid 1129) 114s
run: rabbitmq: (pid 1151) 114s; run: log: (pid 1150) 114s
run: redis_lb: (pid 1145) 114s; run: log: (pid 1144) 114s
CREATE ADMIN USER & ORGANIZATION
Create an admin user who will have access to make changes to the infrastructure components in the organization.
The below command will generate the RSA private key automatically & should be saved to a safe location.
Syntax:
chef-server-ctl user-create user_name first_name last_name email password file_name
#cd /opt/chef
#chef-server-ctl user-create chefadmin chef admin [email protected] 'password123' --filename chefadmin.pem
# chef-server-ctl user-list
chefadmin
pivotal
Run the following command to create an organization and provide the access to the user to whom you want to provide the access.
Syntax:
chef-server-ctl org-create short_name ‘first_organization_name’ --assocaition_user user_name --filename organization-validator.pem
# chef-server-ctl org-create zcs 'Zippyops Consulting Services' --association_user chefadmin --filename zcs-validator.pem
# chef-server-ctl org-list
zcs
INSTALL CHEF MANAGEMENT CONSOLE
The Chef management console enables the management of nodes, data bags, roles, environments, and cookbooks by using a web user interface.
Now install the chef management console using the following command:
#cd /opt/chef
# chef-server-ctl install chef-manage
After installing the management console, reconfigure the chef server and its services to update these changes.
#chef-manage-ctl reconfigure
#chef-server-ctl reconfigure
INSTALL CHEF REPORTING
Use Reporting to keep track of what happens during the execution of chef-client runs across all of the machines that are under management by Chef.
Reporting data is collected during the chef-client run and the results are posted to the Chef server at the end of the chef-client run at the same time the node object is uploaded to the Chef server
Reporting has the following minimum requirements:
*Chef server 12
*Chef-client version 11.6.0 (or later)
The Reporting client is built into the chef-client and can run on all platforms that chef-client is supported on.
#chef-server-ctl install opscode-reporting
#opscode-reporting-ctl reconfigure
#chef-server-ctl reconfigure
#firewall-cmd --zone=public --add-port={80/tcp,443/tcp} --permanent
#firewall-cmd --reload
Go to the Browser and provide the IP
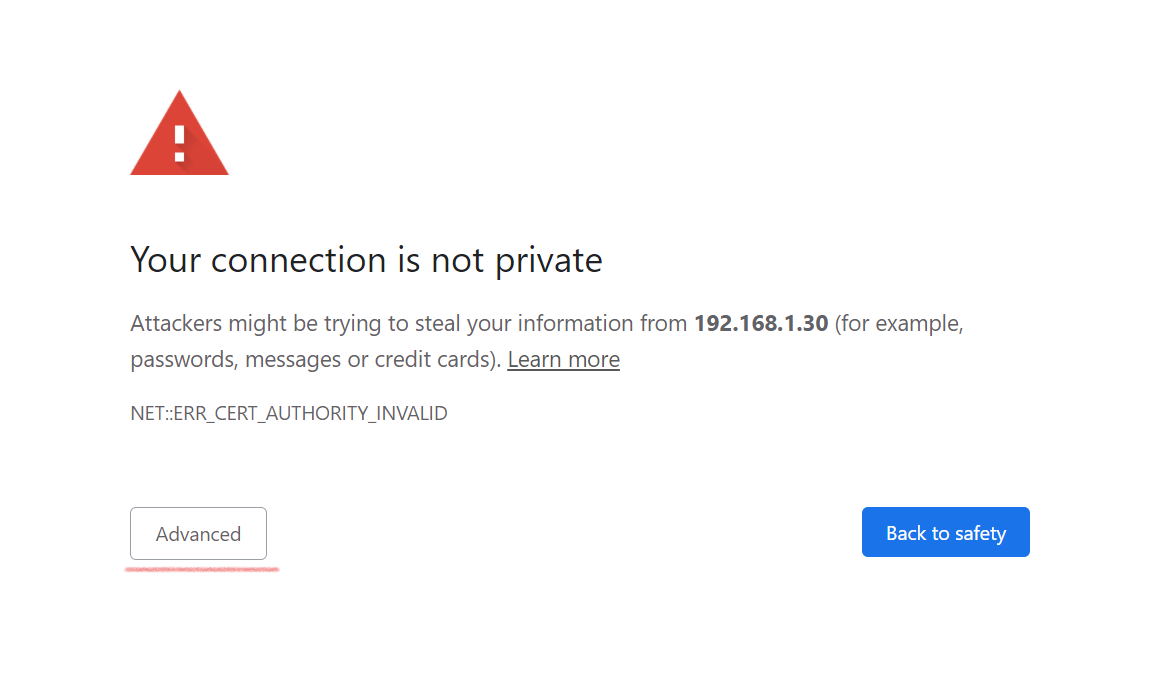
Example: https://192.168.1.30
Provide the user name password example (username: chefadmin, password: password123)
Once the Master IP is given the page projects like this, Now click on the Advanced option
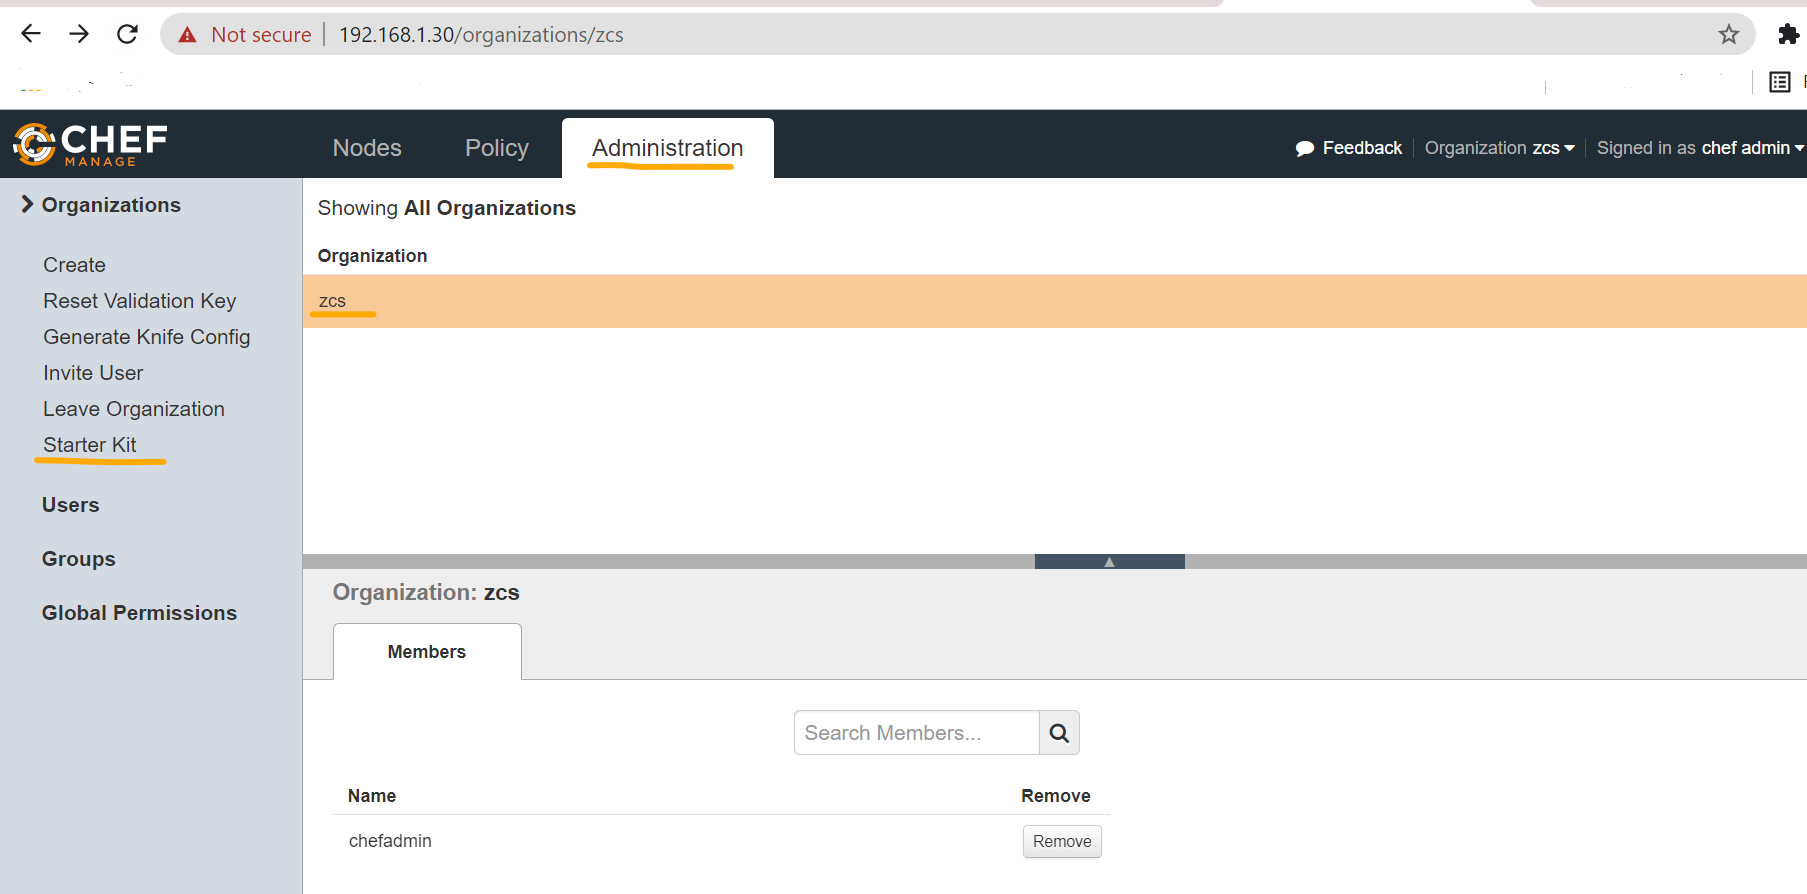
After then, the Chef console will open & enter the Username & Password to Sign In and Click on Administration Tab and click on the organization list which is already created with the users shown here.

CHEF WORKSTATION
On a Chef workstation, you can interact with the Chef Server or any physical nodes (Servers, network equipment, etc) in your infrastructure
Using Chef workstation, we can use several chef related commands (e.g., knife), creating cookbooks or recipes that will be executed on the individual nodes and bootstrapping a new node from the chef workstation
Chef workstation consists of two primary components:
*Knife Utility (Development Kit)
*Chef Repository (Starter Kit)
CHEF DEVELOPMENT KIT - DOWNLOAD, INSTALL & VERIFY
ChefDK stands for Chef Development Kit. ChefDK is available for almost all platforms including Debian Based Distros, Ubuntu, RedHat Based Distros like CentOS, Mac OS X, and Windows.ChefDK includes the chef-client, an embedded version of Ruby, RubyGems, and OpenSSL,
as well as our tools: Test Kitchen, Cookstyle, Foodcritic, and ChefSpec.The Chef installer puts everything into a unique directory (../chefdk/ on macOS / Linux & C:\opscode\chefdk\ on Windows) so that these components will not interfere with other applications that may be running on the target machine
Download the Chefdk package from its official site by running the wget command followed by the download link.
#wget https://packages.chef.io/files/stable/chefdk/2.0.28/el/7/chefdk-2.0.28-1.el7.x86_64.rpm
--2021-05-18 07:52:21-- https://packages.chef.io/files/stable/chefdk/2.0.28/el/7/chefdk-2.0.28-1.el7.x86_64.rpm
Resolving packages.chef.io (packages.chef.io)... 151.101.158.110
Connecting to packages.chef.io (packages.chef.io)|151.101.158.110|:443... connected.
HTTP request sent, awaiting response... 200 OK
Length: 102628029 (98M) [application/x-rpm]
Saving to: ‘chefdk-2.0.28-1.el7.x86_64.rpm’
100%[===================================================================================================================>] 102,628,029 4.02MB/s in 26s
2021-05-18 07:52:56 (3.72 MB/s) - ‘chefdk-2.0.28-1.el7.x86_64.rpm’ saved [102628029/102628029]
The package is downloaded to the target system. Next install the chefdk by executing the rpm command.
# rpm -ivh chefdk-2.0.28-1.el7.x86_64.rpm
warning: chefdk-2.0.28-1.el7.x86_64.rpm: Header V4 DSA/SHA1 Signature, key ID 83ef826a: NOKEY
Preparing... ################################# [100%]
Updating / installing...
1:chefdk-2.0.28-1.el7 ################################# [100%]
Thank you for installing Chef Development Kit!
The Chef application is installed successfully in your system. You can also verify the ChefDK installation procedure by running the following command.
# chef verify
[WARN] This is an internal command used by the ChefDK development team. If you are a ChefDK user, please do not run it.
Running verification for component 'berkshelf'
Running verification for component 'test-kitchen'
Running verification for component 'tk-policyfile-provisioner'
Running verification for component 'chef-client'
Running verification for component 'chef-dk'
Running verification for component 'chef-provisioning'
Running verification for component 'chefspec'
.
.
---------------------------------------------
Verification of component 'openssl' succeeded.
Verification of component 'delivery-cli' succeeded.
Verification of component 'kitchen-vagrant' succeeded.
Verification of component 'git' succeeded.
Verification of component 'fauxhai' succeeded.
You can also check the version of the installed chef application by executing the following command.
#chef --version
Chef Development Kit Version: 2.0.28
chef-client version: 13.2.20
delivery version: master (17c1b0fed9be4c70f69091a6d21a4cbf0df60a23)
berks version: 6.2.0
kitchen version: 1.16.0
inspec version: 1.31.1
CHEF STARTER KIT - DOWNLOAD, INSTALL & VERIFY
The Starter Kit contains a file named Berksfile that lists your cookbooks. Berkshelf is a tool for managing cookbooks and their dependencies. It downloads a specified cookbook into local storage, which is called the Berkshelf. You can specify which cookbooks and versions to use with your Chef server and upload them. Once you downloaded the starter kit, it contains the necessary configuration files such as the .chef directory, config.rb, ORGANIZATION-validator.pem, and USER.pem under the chef-repo directory.
Login to Chef Manage GUI on the chef server and click the “Administration” tab and select the organization “zcs” from the list. Once the organization is selected, click on “Starter Kit” from the menu on the left side as shown below.

Click the “Proceed” button, which will download chef-starter.zip file to your local machine.Transfer the chef-starter.zip to the root’s home directory & unzip the file. It will create a chef-repo folder which contains the configuration files from chef server.
# unzip chef-starter.zip
Archive: chef-starter.zip
inflating: chef-repo/.gitignore
inflating: chef-repo/README.md
creating: chef-repo/cookbooks/
inflating: chef-repo/cookbooks/chefignore
creating: chef-repo/cookbooks/starter/
creating: chef-repo/cookbooks/starter/attributes/
inflating: chef-repo/cookbooks/starter/attributes/default.rb
creating: chef-repo/cookbooks/starter/files/
creating: chef-repo/cookbooks/starter/files/default/
inflating: chef-repo/cookbooks/starter/files/default/sample.txt
inflating: chef-repo/cookbooks/starter/metadata.rb
creating: chef-repo/cookbooks/starter/recipes/
inflating: chef-repo/cookbooks/starter/recipes/default.rb
creating: chef-repo/cookbooks/starter/templates/
creating: chef-repo/cookbooks/starter/templates/default/
inflating: chef-repo/cookbooks/starter/templates/default/sample.erb
creating: chef-repo/.chef/
creating: chef-repo/roles/
inflating: chef-repo/.chef/config.rb
inflating: chef-repo/roles/starter.rb
inflating: chef-repo/.chef/chefadmin.pem
#ls
chef-repo chef-starter.zip
# cd chef-repo/
# cd .chef/
# ls
chefadmin.pem config.rb
# cat config.rb
# See https://docs.getchef.com/config_rb.html for more information on knife configuration options
current_dir = File.dirname(__FILE__)
log_level :info
log_location STDOUT
node_name "chefadmin"
client_key "#{current_dir}/chefadmin.pem"
chef_server_url "https://chefserver.zippyops.com/organizations/zcs"
cookbook_path ["#{current_dir}/../cookbooks"]
The knife ssl fetch command is used to copy SSL certificates from an HTTPS server to the trusted_certs_dir directory that is used by the knife and the chef-client to store trusted SSL certificates.
# knife ssl fetch
WARNING: Certificates from chefserver.zippyops.com will be fetched and placed in your trusted_cert
directory (/root/chefdk/chef-repo/.chef/trusted_certs).
The knife has no means to verify these are the correct certificates. You should
verify the authenticity of these certificates after downloading.
Adding certificate for chefserver_zippyops_com in /root/chefdk/chef-repo/.chef/trusted_certs/chefserver_zippyops_com.crt
# knife ssl check
Connecting to host chefserver.zippyops.com:443
Successfully verified certificates from `chefserver.zippyops.com'
# knife client list
zcs-validator
# knife user list
chefadmin
BOOTSTRAP A NODE USING CHEF WORKSTATION
Bootstrap is a process that installs the chef-client on a target system (different platforms such as CentOS, Ubuntu & Windows OS) so that it can run as a chef-client and communicate with a chef server. Installing & configuring a node with chef agent which will start pulling configuration from central chef server, using knife command.
Bootstrap the client node either using the client node’s root user or a user with elevated privileges:
As the node’s root user, change the password to your root password and node name to the desired name for your client node:
*knife bootstrap 192.0.2.0 -x root -P password --node-name node name
As a user with sudo privileges, change username to a node user, password to the user’s password, and node name to the desired name for the client node:
*knife bootstrap 192.0.2.0 -x username -P password --sudo --node-name node name
As a user with key-pair authentication, change username to a node user and node name to the desired name for the client node:
*knife bootstrap 192.0.2.0 --ssh-user username --sudo --identity-file
ADDING A CENTOS NODE
Now adding the chefnode to the chef server using bootstrap command as follows:
# knife bootstrap 192.168.1.25 -N chefclient.zippyops.com
Creating new client for chefclient.zippyops.com
Creating new node for chefclient.zippyops.com
Connecting to 192.168.1.25
[email protected]'s password:
192.168.1.25 -----> Installing Chef Omnibus (-v 13)
192.168.1.25 downloading https://omnitruck-direct.chef.io/chef/install.sh
192.168.1.25 to file /tmp/install.sh.1476/install.sh
192.168.1.25 trying wget...
ef-13.12.14-1.el7.x86_64.rpm: Header V4 DSA/SHA1 Signature, key ID 83ef826a: NOKEY
192.168.1.25 Preparing... ################################# [100%]
192.168.1.25 Updating / installing...
192.168.1.25 1:chef-13.12.14-1.el7 ################################# [100%]
192.168.1.25
192.168.1.25 Running handlers:
192.168.1.25 Running handlers complete
192.168.1.25 Chef Client finished, 0/0 resources updated in 04 seconds
# knife client list
chefclient.zippyops.com
zcs-validator
Once the bootstrapping is complete, click the “Nodes” tab a new machine has been listed.
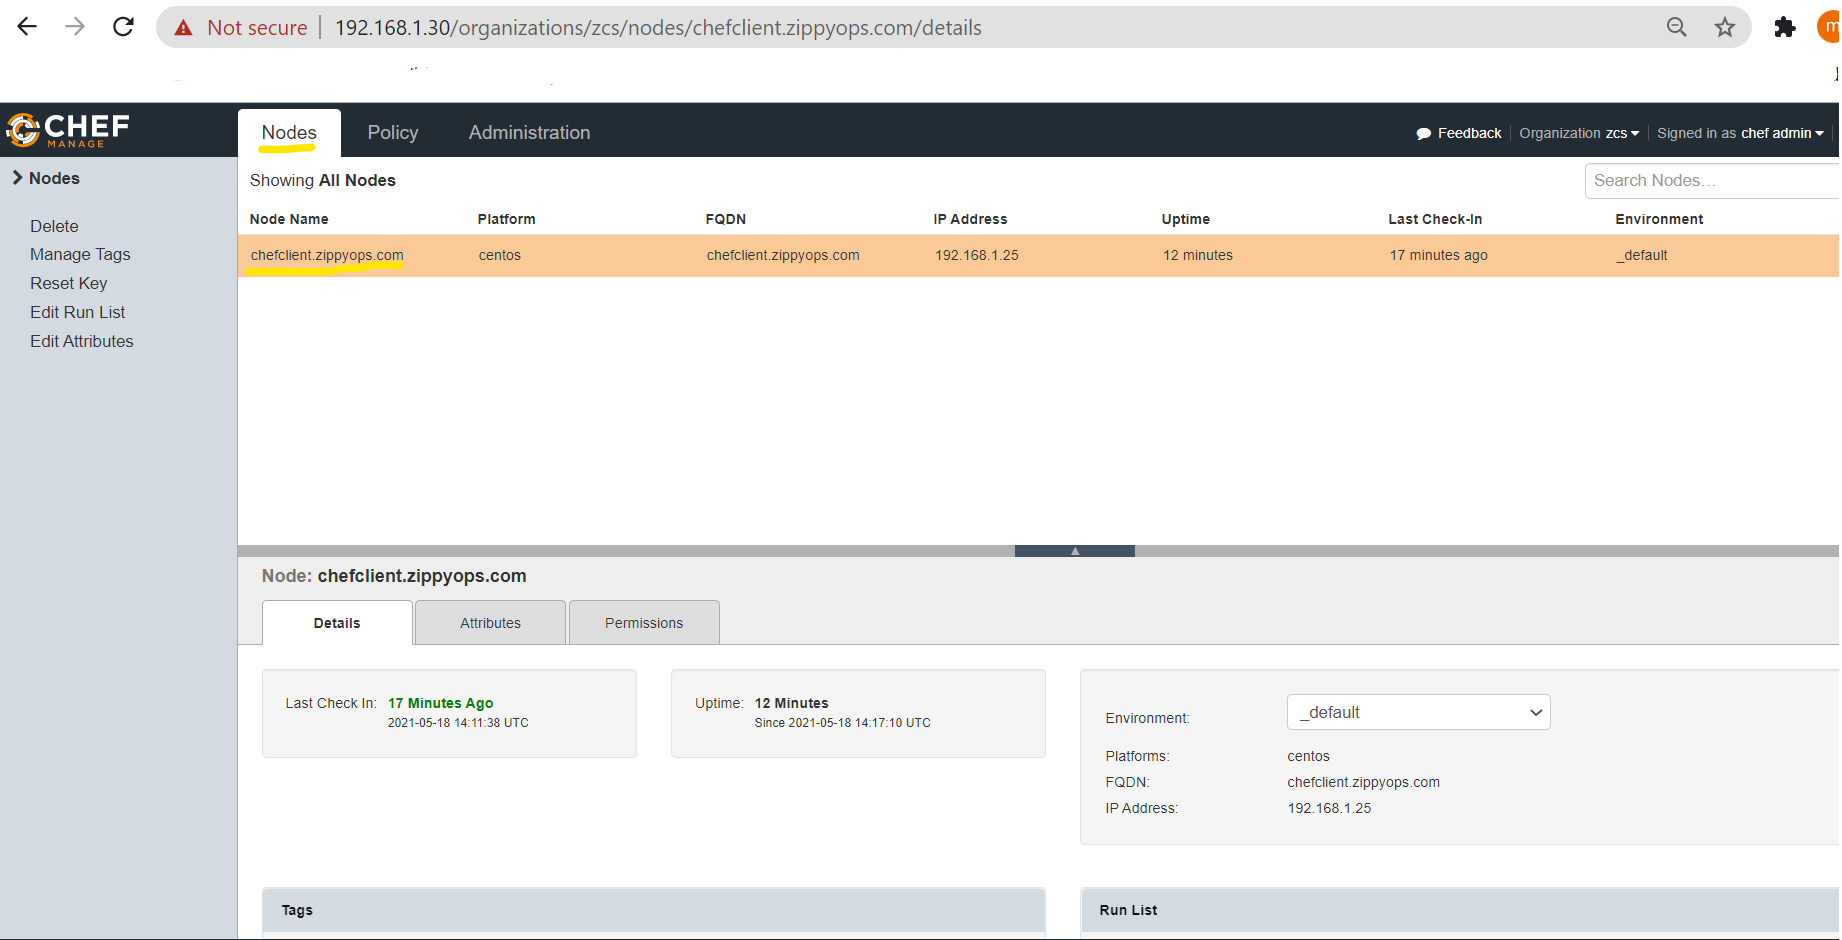
Thus, the centos node has been added to the chef-server nodes list
ADDING AN UBUNTU NODE
Adding an Ubuntu node to the Chef server using the below steps:
First set the hostname for the Ubuntu node and update the hostname along with the IP address of the Chef server & Chef Workstation on the /etc/hosts file.
# hostnamectl set-hostname ubuntunode.zippyops.com
# exec bash
# cat /etc/hosts
127.0.0.1 localhost.localdomain localhost
::1 localhost6.localdomain6 localhost6
192.168.1.30 chefserver.zippyops.com
192.168.1.24 chefdk.zippyops.com
192.168.1.23 ubuntunode.zippyops.com
Activate the ssh service for the Ubuntu node which will connect to the Chef server.
Install, Configure and start the ssh service using the following commands.
# apt-get install openssh-server openssh-client
Change the root login permission for the ssh config file
# cat /etc/ssh/sshd_config
Port 22
...
LoginGraceTime 2m
PermitRootLogin yes
StrictModes yes
#systemctl start sshd
# systemctl enable ssh
Synchronizing state of ssh.service with SysV service script with /lib/systemd/systemd-sysv-install.
Executing: /lib/systemd/systemd-sysv-install enable ssh
Now, allow port 22 for the ssh service using the following command:
# sudo ufw allow 22
Rules updated
Rules updated (v6)
Now we will add the ubuntu node to the chef server from the chef workstation using the bootstrap command.
# knife bootstrap 192.168.1.23 --ssh-user zippyops --sudo -N ubuntunode.zippyops.com
Creating new client for ubuntunode.zippyops.com
Creating new node for ubuntunode.zippyops.com
Connecting to 192.168.1.23
[email protected]'s password:
192.168.1.23 knife sudo password:
Enter your password:
192.168.1.23
192.168.1.23 -----> Installing Chef Omnibus (-v 13)
192.168.1.23 downloading https://omnitruck-direct.chef.io/chef/install.sh
192.168.1.23 to file /tmp/install.sh.2523/install.sh
192.168.1.23 trying wget...
192.168.1.23 ubuntu 18.04 x86_64
192.168.1.23 Getting information for chef stable 13 for ubuntu...
192.168.1.23 downloading https://omnitruck-direct.chef.io/stable/chef/metadata?v=13&p=ubuntu&pv=18.04&m=x86_64
192.168.1.23 to file /tmp/install.sh.2527/metadata.txt
192.168.1.23 trying wget...
192.168.1.23 sha1 d4245bff62f19cd84d4500f3abb23d5e0ee557c1
192.168.1.23 sha256 a2373e135bc22768f186f099b5ac824ce38e57969d92a1d1c23bfec50094199c
192.168.1.23 url https://packages.chef.io/files/stable/chef/13.12.14/ubuntu/18.04/chef_13.12.14-1_amd64.deb
192.168.1.23 version 13.12.14
192.168.1.23 downloaded metadata file looks valid...
192.168.1.23 downloading https://packages.chef.io/files/stable/chef/13.12.14/ubuntu/18.04/chef_13.12.14-1_amd64.deb
192.168.1.23 Running handlers:
192.168.1.23 Running handlers complete
192.168.1.23 Chef Client finished, 0/0 resources updated in 17 seconds
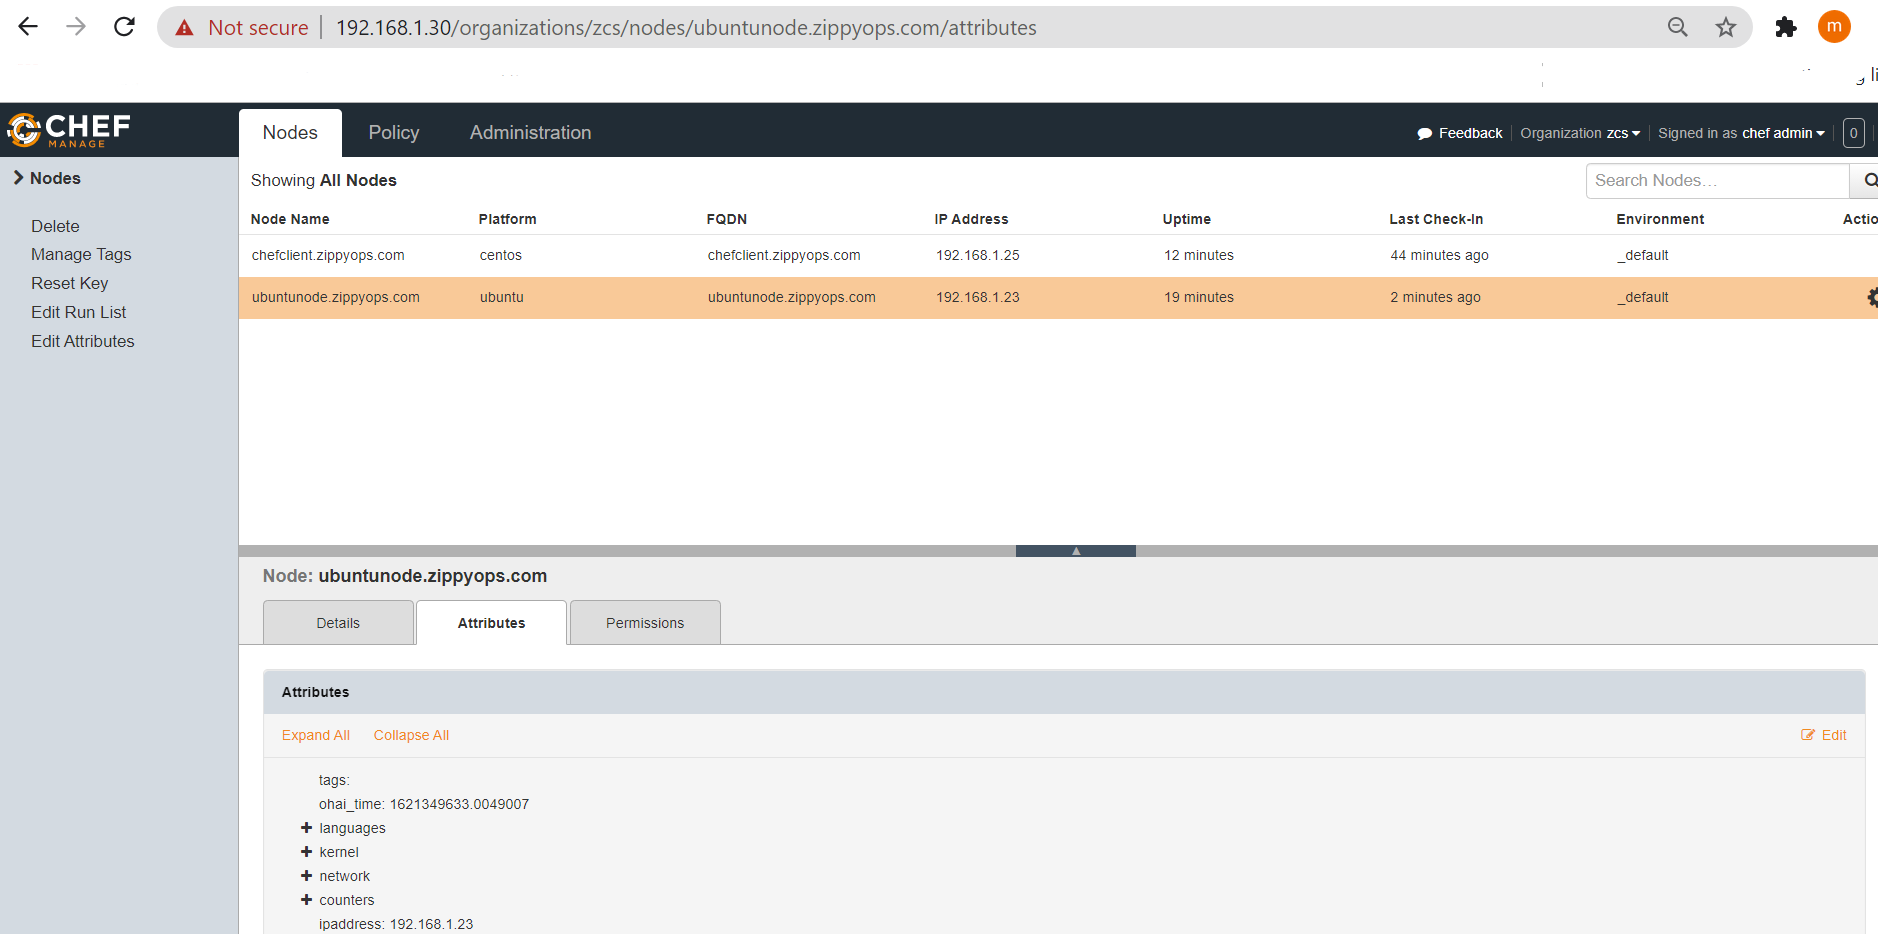
Now, refreshing the Chef server console and the Ubuntu node is added to the nodes list.
ADDING AN WINDOWS NODE (EX: WINDOWS 10)
Let us see how to add a Windows Node to the Chef Server step by step.
Generally, there are two ways to add a windows node
*Creating a Workstation on Windows node & Bootstrapping the node to the Chef Server
*Bootstrapping the Windows node from the Chef Server or Chef Workstation node.
On both the methods “WinRM” should be activated from the windows node.
Now enable the “WinRM” port “5985” & “5986” on both the Windows Node and Chef Server.
Open the command prompt & get the IP address of the windows node using the command “ipconfig”.
C:\WINDOWS\system32>ipconfig
Connection-specific DNS Suffix . :
Link-local IPv6 Address . . . . . : fe80::d8a1:12dd:167c:1385
IPv4 Address. . . . . . . . . . . : 192.168.1.13
Subnet Mask . . . . . . . . . . . : 255.255.255.0
Default Gateway . . . . . . . . . : 192.168.1.1
Add the IP address and hostname of the Chef Server and Chef Workstation on the windows node. Navigate to the path for the file C:\Windows\System32\drivers\etc\hosts.Open the file through Notepad++ or any text editors.
Activating WinRm on Windows 10
Open the PowerShell & login as an Administrator:
Activate the WinRm
*Change the Network Connection type from Public into either Domain or Private
*Enable the Port 5985 & 5986
C:\Users\zippyops> winrm quickconfig
WinRM is not set up to receive requests on this machine.
The following changes must be made:
Start the WinRM service.
Set the WinRM service type to delayed auto start.
Make these changes [y/n]? y
WinRM has been updated to receive requests.
WinRM service type changed successfully.
WinRM service started.
WinRM is already set up for remote management on this computer.
C:\Users\zippyops> Set-NetConnectionProfile -NetworkCategory Private
Name : Unidentified network
InterfaceAlias : Ethernet 4
InterfaceIndex : 15
NetworkCategory : Private
IPv4Connectivity : NoTraffic
IPv6Connectivity : NoTraffic
C:\Users\zippyops> Get-NetFirewallPortFilter | ?{$_.LocalPort -eq 5985 } | Get-NetFirewallRule | ?{ $_.Direction -eq "Inbound" -and $_.Profile -eq "Public" -and $_.Action -eq "Allow"} | Set-NetFirewallRule -RemoteAddress "Any"
C:\Users\zippyops> Get-NetFirewallPortFilter | ?{$_.LocalPort -eq 5986 } | Get-NetFirewallRule | ?{ $_.Direction -eq "Inbound" -and $_.Profile -eq "Public" -and $_.Action -eq "Allow"} | Set-NetFirewallRule -RemoteAddress "Any"
Enable basic authentication on the WinRM service & WinRM Client.
C:\> winrm e winrm/config/listener
Listener
Address = *
Transport = HTTP
Port = 5985
Hostname
Enabled = true
URLPrefix = wsman
CertificateThumbprint
ListeningOn = 127.0.0.1, 169.254.84.217, 169.254.135.25, 169.254.215.56, 169.254.228.77, 169.254.254.78, 192.168.1.13, ::1, fe80::525:4928:4742:fe4e%6, fe80::20a8:358d:3038:54d9#, fe80::9581:d64:271f:e44d%9, fe80::cd83:1408:e90b:8719, fe80::d515:8025:c5ab:d738%7, fe80::d8a1:12dd:167c:1385
C:\> winrm get winrm/config/service
Service
RootSDDL = O:NSG:BAD:P(A;;GA;;;BA)(A;;GR;;;IU)S:P(AU;FA;GA;;;WD)(AU;SA;GXGW;;;WD)
MaxConcurrentOperations = 4294967295
MaxConcurrentOperationsPerUser = 1500
EnumerationTimeoutms = 240000
MaxConnections = 300
MaxPacketRetrievalTimeSeconds = 120
AllowUnencrypted = false
Auth
Basic = false
Kerberos = true
Negotiate = true
Certificate = false
CredSSP = false
CbtHardeningLevel = Relaxed
DefaultPorts
HTTP = 5985
HTTPS = 5986
IPv4Filter = *
IPv6Filter = *
EnableCompatibilityHttpListener = false
EnableCompatibilityHttpsListener = false
CertificateThumbprint
AllowRemoteAccess = true
Now add the windows node from the chef workstation to the chef-server using the following command
# knife bootstrap windows winrm 192.168.1.13 -x zippyops -N windows10
Enter your password:
Creating new client for windows10
Creating new node for windows10
Waiting for remote response before bootstrap.192.168.1.13.
192.168.1.13 Response received.
The remote node responded after 0.03 minutes.
Bootstrapping Chef on 192.168.1.13
192.168.1.13 Rendering "C:\Users\zippyops\AppData\Local\Temp\bootstrap-2589-1621357549.bat" chunk 1
192.168.1.13 Rendering "C:\Users\zippyops\AppData\Local\Temp\bootstrap-2589-1621357549.bat" chunk 2
192.168.1.13 Rendering "C:\Users\zippyops\AppData\Local\Temp\bootstrap-2589-1621357549.bat" chunk 3
192.168.1.13 Successfully installed Chef Client package.
192.168.1.13 Installation completed successfully
192.168.1.13 Writing validation key...
192.168.1.13 Validation key written.
192.168.1.13
192.168.1.13 C:\Users\zippyops>mkdir C:\chef\trusted_certs
192.168.1.13
192.168.1.13 C:\Users\zippyops>(
192.168.1.13 echo.-----BEGIN CERTIFICATE-----
192.168.1.13 echo.MIIESjCCAzKgAwIBAgIBADANBgkqhkiG9w0BAQsFADBuMQswCQYDVQQGEwJVUzEK
192.168.1.13 echo.MAgGA1UECAwBIDEKMAgGA1UEBwwBIDEQMA4GA1UECgwHWW91Q29ycDETMBEGA1UE
192.168.1.13 echo.CwwKT3BlcmF0aW9uczEgMB4GA1UEAwwXY2hlZnNlcnZlci56aXBweW9wcy5jb20w
192.168.1.13 echo.HhcNMjEwNTE4MDc1NzA0WhcNMzEwNTE2MDc1NzA0WjBuMQswCQYDVQQGEwJVUzEK
192.168.1.13 echo.MAgGA1UECAwBIDEKMAgGA1UEBwwBIDEQMA4GA1UECgwHWW91Q29ycDETMBEGA1UE
192.168.1.13 echo.CwwKT3BlcmF0aW9uczEgMB4GA1UEAwwXY2hlZnNlcnZlci56aXBweW9wcy5jb20w
192.168.1.13 echo.ggEiMA0GCSqGSIb3DQEBAQUAA4IBDwAwggEKAoIBAQCdAv4B1vpt7HwImpUHOjk1
192.168.1.13 echo.Q7dYVncEDuG+wXd80mx3AE5qb1/FnHoRQJoUfBZ3vlF+YdY4PGpmJCGUse9zDYMK
192.168.1.13 echo.KPEMGGCU9ufup1docC7M93jINPBRjwv74koqNcye78DKDgl5dsbQjMWYzaZg5MTT
192.168.1.13 echo.ZCNVt/8wLA1lqCR+xpo+frLvm7YuzU0XySojGja0dygeR8l53yCYcHmBgZwAKUlu
192.168.1.13 echo.c9+7cr+gRbQTWWYueZruC1Eo4VUFt1ED0kMPlrRBLnE+45jHD6R1LkYzkZwxJs5T
192.168.1.13 echo.z/9s5HWLAzj4noYv2cREnUwWxiB6TXsuAn+Gw+lIFKP0eFfM72K0BRNBfFr8ZHyR
192.168.1.13 echo.AgMBAAGjgfIwge8wDwYDVR0TAQH/BAUwAwEB/zAdBgNVHQ4EFgQUgBDfNrsiZde1
192.168.1.13 echo.ZnC2y+YNEQfRSxowIgYDVR0RBBswGYIXY2hlZnNlcnZlci56aXBweW9wcy5jb20w
192.168.1.13 echo.gZgGA1UdIwSBkDCBjYAUgBDfNrsiZde1ZnC2y+YNEQfRSxqhcqRwMG4xCzAJBgNV
192.168.1.13 echo.BAYTAlVTMQowCAYDVQQIDAEgMQowCAYDVQQHDAEgMRAwDgYDVQQKDAdZb3VDb3Jw
192.168.1.13 echo.MRMwEQYDVQQLDApPcGVyYXRpb25zMSAwHgYDVQQDDBdjaGVmc2VydmVyLnppcHB5
192.168.1.13 echo.b3BzLmNvbYIBADANBgkqhkiG9w0BAQsFAAOCAQEAlnbB6U+Gv6zshuEh+0lNfTxV
192.168.1.13 echo.so76IY+oU/mIkySQFwVldnXVXgzpt7rISdH7vFf6Qaqtx+YmDJCiCD84zM+m9Hcl
192.168.1.13 echo.d6vWo6AxYIKiEyyRX6sHJd8fccGW8XJqb9P3HFXEV8b5jdmrOrCbRw3Dlg3cfCfW
192.168.1.13 echo.GcnzxmFTAy/Hhw8wdx9anKRjlM0UoO9yqIvkE00DYNvaP/NZDnPqhungNyln/ppR
192.168.1.13 echo.D/k/D0A6z1gqwBAqofdFFbWLBt3ixg0tHIsXvbwE6wO4sX53bAJmhfQIM9T6jv8D
192.168.1.13 echo.C8Pzgjud0HAHEpGxDUIdz8ip3Tj6m/Boa+M4IptuibuGFZQdFIK65s4s3u4awA==
192.168.1.13 echo.-----END CERTIFICATE-----
192.168.1.13 ) 1>C:\chef/trusted_certs/chefserver_zippyops_com.crt
192.168.1.13
192.168.1.13 C:\Users\zippyops>(
192.168.1.13 echo.chef_server_url "https://chefserver.zippyops.com/organizations/zcs"
192.168.1.13 echo.validation_client_name "chef-validator"
192.168.1.13 echo.file_cache_path "c:/chef/cache"
192.168.1.13 echo.file_backup_path "c:/chef/backup"
192.168.1.13 Running handlers:
192.168.1.13 [2021-05-18T22:43:37+05:30] INFO: Running report handlers
192.168.1.13 Running handlers complete
192.168.1.13 [2021-05-18T22:43:37+05:30] INFO: Report handlers complete
192.168.1.13 Chef Client finished, 0/0 resources updated in 17 seconds
Check the Windows Host added on the node list on both Chef Server Manage console and Command Line mode.
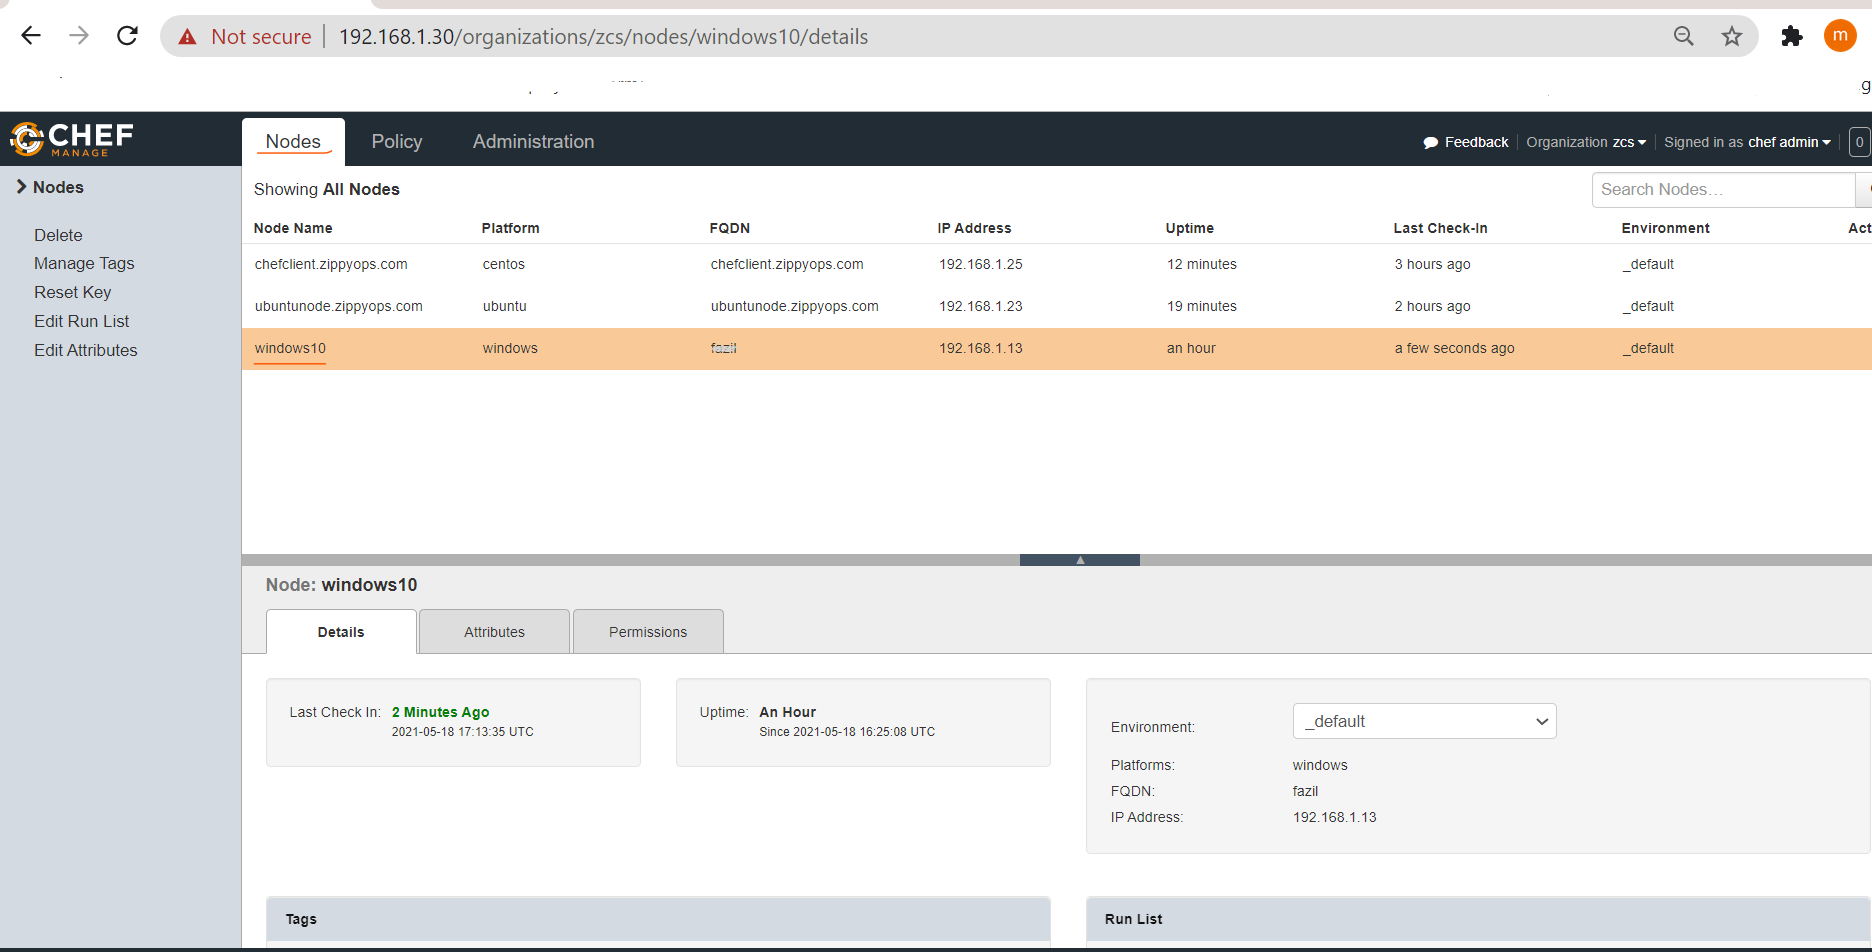
# knife status
3 hours ago, chefclient.zippyops.com, centos 7.9.2009.
2 hours ago, ubuntunode.zippyops.com, ubuntu 18.04.
8 minutes ago, windows10, windows 10.0.19042.
# knife node list
chefclient.zippyops.com
ubuntunode.zippyops.com
windows10
Successfully, added the three different types of nodes (CentOS, Ubuntu & Windows) to the Chef Server.
Relevant Blogs:
Recent Comments
No comments
Leave a Comment
We will be happy to hear what you think about this post