How to Securely Configure an AWS EC2 Instance
AWS EC2 is one of AWS's most popular and widely used services. In this article, learn some of the ways that can help configure our EC2 instances securely.
AWS’ Elastic Compute Cloud, more popularly known as EC2, is a service that allows organizations to spin up virtual machines that can be used to host and run applications, databases, and much more. EC2 instances come with a wide variety of options, from selecting the number of CPU cores to disk space, memory, and operating system, to name a few. The EC2 service also comes packed with different configuration options and settings for an instance to work with. Uncle Ben said, “With great power comes great responsibility,” and in this case with a lot of settings to choose from comes a lot of misconfigurations. Thus, this article will look at how we can securely configure our EC2 instances.
Secure Configurations for EC2 Instances
Although this is not an exhaustive list of actions to take to secure your instances, these configurations are a good starting point as they are easy to understand as well as implement. As one gets familiar with AWS and its various other services, additional (advanced) measures can be taken to further strengthen the security of EC2 instances. For now, we will stick to the list of security settings that are directly applicable to EC2 instances.
Enable IMDSv2
Instance metadata service (IMDS) provides information about the instance and various parameters associated with it such as user data that is specified at launch. IMDSv1 stored credentials in the endpoint which could be retrieved and then used to perform actions with, say, AWS CLI with those credentials. This could prove devastating in the case of the credentials being infiltrated. Thus, IMDSv2 was introduced to stop various attacks against the abuse of metadata endpoints. IMDSv2 uses a session but does not store the session token as information in the endpoint itself, making it impossible to retrieve the token after it is generated in subsequent calls.
Enable IMDSv2 for a New Instance via Console
When launching an instance, under the “Configure Instance Details” page, navigate to the “Advanced Details” section, and:
- Select “Enabled” for the “Metadata accessible” option.
- Select “V2 (token required)” for the “Metadata version” option.

Enable IMDSv2 for New Instance With AWS CLI
To enable IMDSv2 while launching an instance with AWS CLI, use the following flag in the command:
aws ec2 run-instances --image-id \ \ --metadata-options "HttpEndpoint=enabled,HttpTokens=required"
Enable IMDSv2 for Existing Instances With AWS CLI
Run the following AWS CLI command to modify the instance and enable IMDSv2:
aws ec2 modify-instance-metadata-options \--instance-id \ --http-tokens required \--http-endpoint enabled
Implement Least Permissive Security Group Rules
Security groups are firewalls that define permitted inbound and outbound reachability to and from the instance to various other resources, on the public internet as well as within the VPCs. It is important to ensure that we expose only those services running on the instance that are required and limit the access to only those users/groups who require it. For that, we need to add security group rules that are as explicit as possible. For example, instead of using 0.0.0.0/0 as the allowed source for SSH protocol, we can specify a common VPN that the team that needs access to the instance uses as the source explicitly.
AWS has extensive documentation for creating and managing security groups and rules available.
Regular Patching
Patching refers to the activity of applying software updates to the operating system for a performance upgrade, bug fixes, and security fixes released by the vendor that maintains the operating system.
The steps for patching differ from OS to OS, but the idea essentially remains the same: use the operating system’s mechanism to check if there is a patch/update available and apply it. Some patches also require reboots for the system although this is not always the case.
For example, the following steps can be performed to patch an EC2 instance running Ubuntu 18.04 as the operating system:
<!--[if !supportLists]-->1. <!--[endif]-->SSH into the EC2 instance
<!--[if !supportLists]-->2. <!--[endif]-->Run sudo apt
update.
<!--[if !supportLists]-->3. <!--[endif]-->Run sudo apt
upgrade.
<!--[if !supportLists]-->4. <!--[endif]-->Run sudo
reboot.
Patching Multiple Machines Parallelly With SSM Agent
Applying a patch manually is fine if the number of instances we are dealing with is small; say, 10. But in most real-life cases, the number is usually bigger than that, and thus patching manually becomes a fairly daunting task. Thankfully, AWS has a service called Systems Manager, or SSM for short. SSM can execute commands on multiple machines simultaneously and take away the hassle of manually accessing one machine at a time, making it an amazingly useful tool to utilize.
"How to Patch the Pwnkit vulnerability (CVE-2021-4034) on the Cloud" explains how to patch multiple EC2 servers using AWS SSM under the section “Patching multiple machines on AWS and GCP > AWS with SSM.”
Enable Regular Backups for EBS Volumes
Data stored on EC2 instances should be regularly backed up to avoid issues of data loss due to disk failures, data corruption, etc. AWS Data Lifecycle Manager is a service that can be utilized to create a backup schedule to take automated backups of our EBS volumes.
Enable Regular Backups via AWS Console
To enable regular backup with Amazon Data Lifecycle Manager from the console, follow the below-mentioned steps:
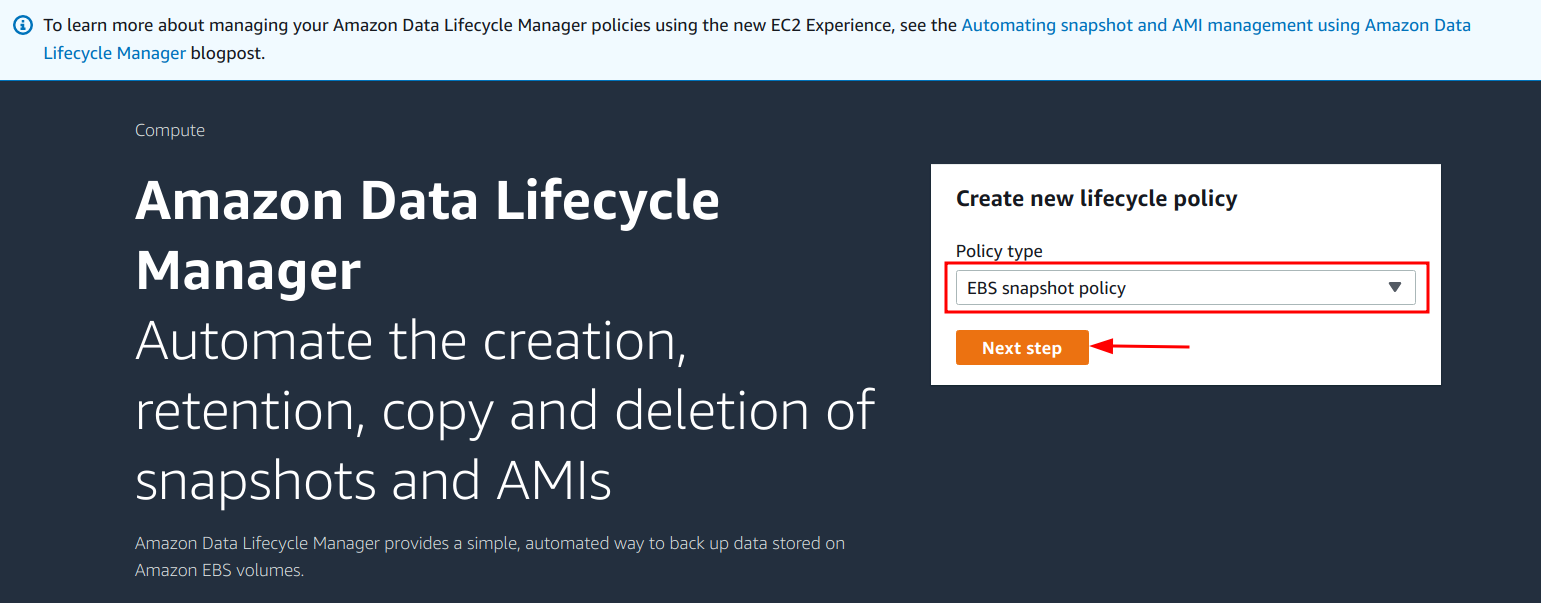
<!--[if !supportLists]-->1. <!--[endif]-->Navigate to the EC2 details page and then select the “Lifecycle Manager” link under the “Elastic Block Storage” sub-menu.
<!--[if !supportLists]-->2. <!--[endif]-->Select the “EBS snapshot policy” and click on the “Next step” button.
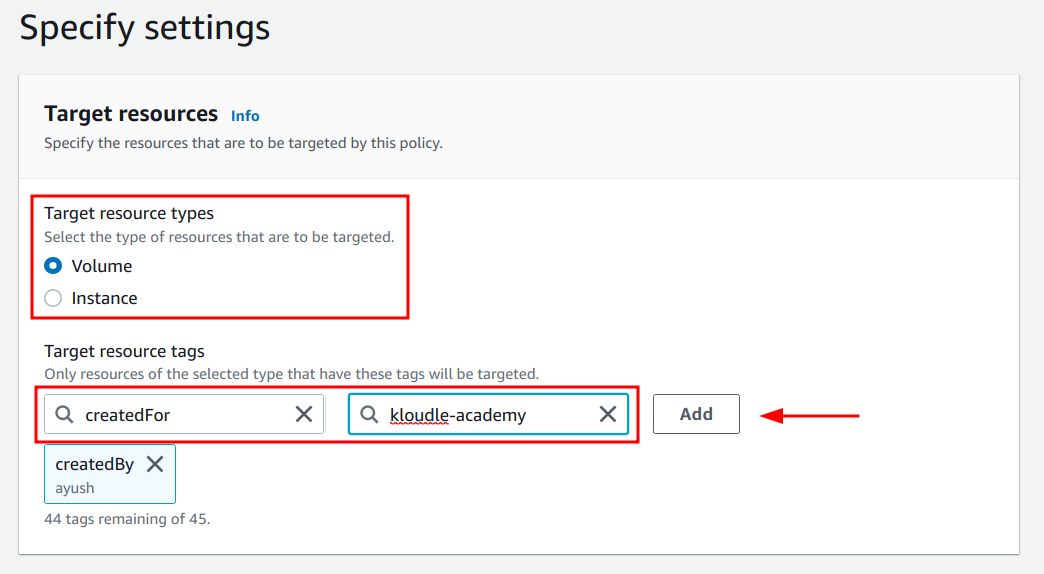
<!--[if !supportLists]-->3. <!--[endif]-->Select the target resource type (Volume or Instance ), and specify the tag to identify the selected resource type. Click on the “Add” button.
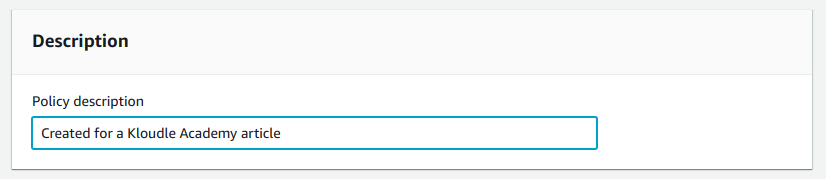
4. Add a
description of the backup policy.
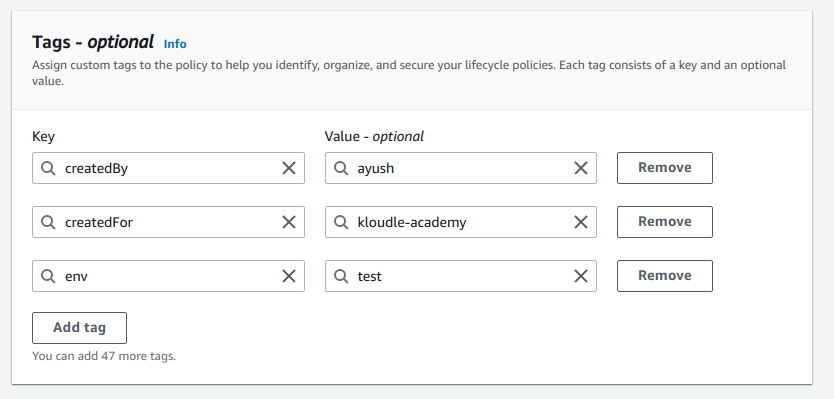
<!--[if !supportLists]-->5. <!--[endif]-->Add necessary tags for the policy.
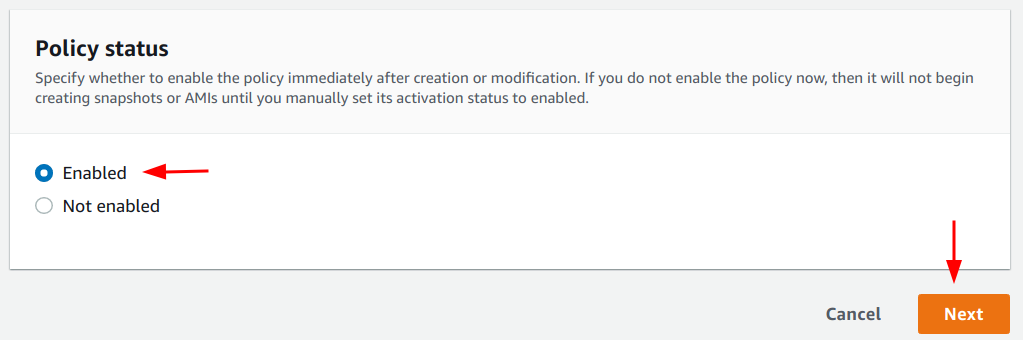
<!--[if !supportLists]-->6. <!--[endif]-->Ensure the “Enabled” option is selected in the “Policy status” section, and click on the “Next” button.
7. Add details for the backup schedule as per requirement. Ideally, a daily backup is recommended.

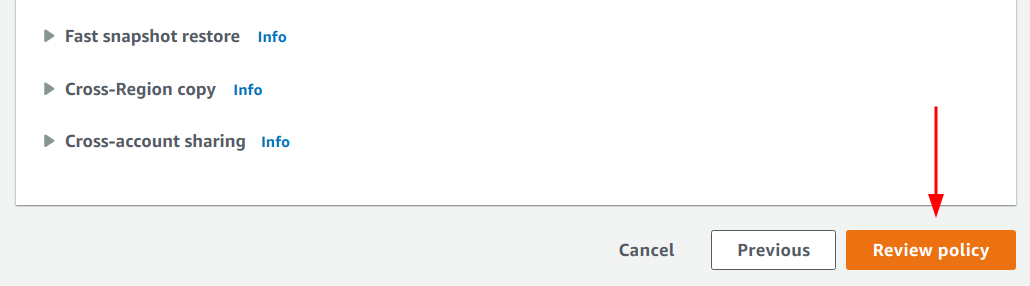
<!--[if !supportLists]-->8. <!--[endif]-->Scroll down and click on the “Review policy” button.
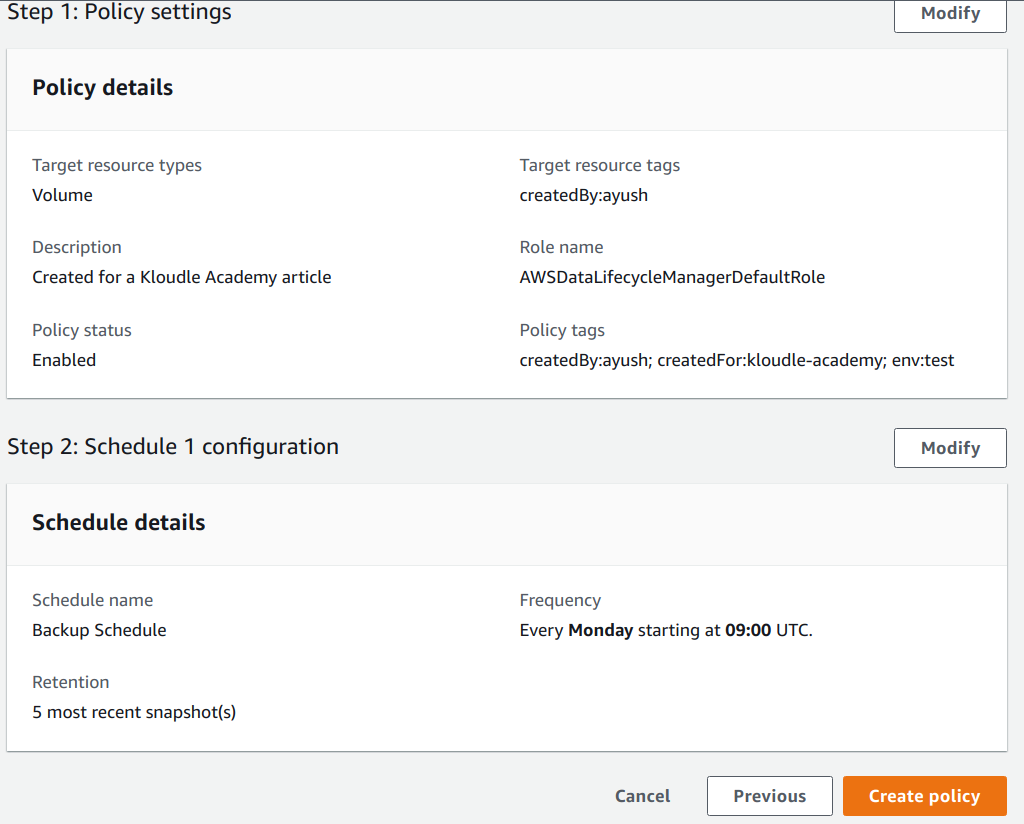
9. Lastly, click on the “Create policy” button to create the backup policy and schedule.
Enable Regular Backups With AWS CLI
To enable regular backup with Amazon Data Lifecycle Manager with AWS CLI, follow the below-mentioned steps:
<!--[if !supportLists]-->1. <!--[endif]-->Create a file called policy.json and add the following contents in the file replacing the configuration as required.
{
"ResourceTypes": [
"VOLUME"
],
"TargetTags": [
{
"Key": "createdBy",
"Value": "ayush"
}
],
"Schedules":[
{
"Name": "DailySnapshots",
"CopyTags": true,
"TagsToAdd": [
{
"Key": "type",
"Value": "myDailySnapshot"
}
],
"CreateRule": {
"Interval": 24,
"IntervalUnit": "HOURS",
"Times": [
"03:00"
]
},
"RetainRule": {
"Count":5
}
}
]
}
<!--[if !supportLists]-->2. <!--[endif]-->Obtain the ARN of the IAM role that would be used to create the backup for EBS volumes.
<!--[if !supportLists]-->3. <!--[endif]-->Lastly, run the following AWS CLI command:
aws dlm create-lifecycle-policy \--description "My first policy" \--state ENABLED \--execution-role-arn \ --policy-details file:///path/to/policy.json
Encrypt EBS Volumes
EBS volumes should be encrypted to ensure that the data they hold cannot be read or misused by unauthorized entities who may have gained access to the volume. We can enable a configuration to enforce encryption on all EBS volumes by default when they are created.
Enable Encryption via Console
To enable encryption by default for the AWS account with AWS CLI, the following steps can be used:
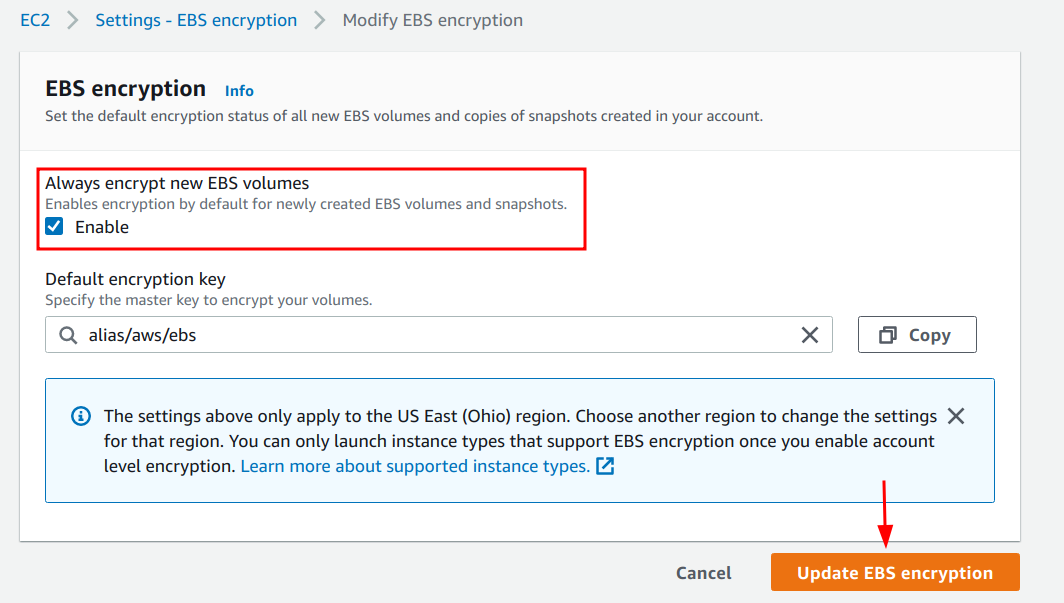
<!--[if !supportLists]-->1. <!--[endif]-->Navigate to the EC2 dashboard page and click on the “EBS encryption” link.

<!--[if !supportLists]-->2. <!--[endif]-->Click on the “Manage” button.
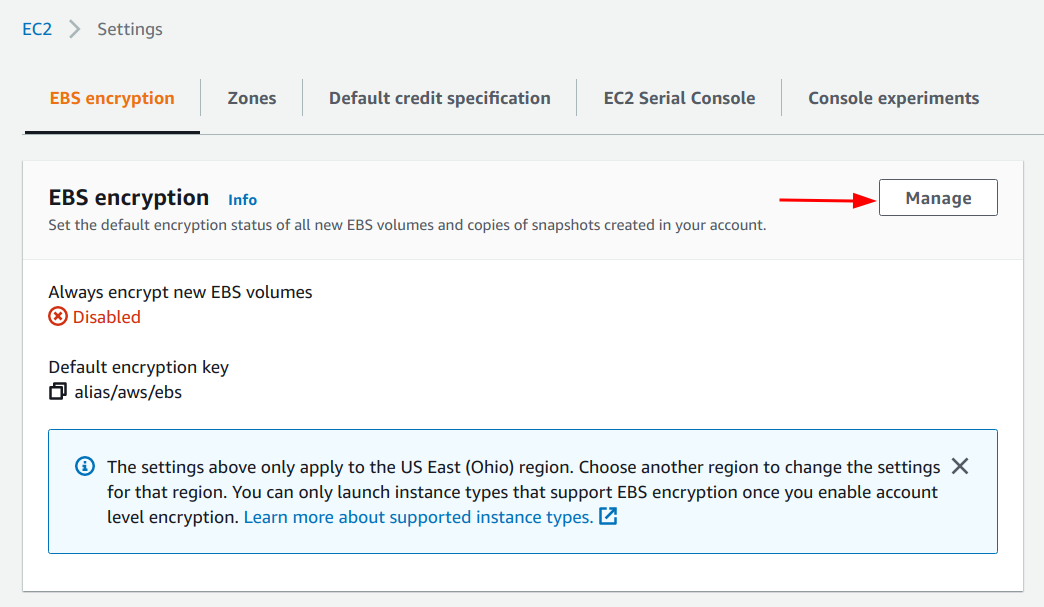
<!--[if !supportLists]-->3. <!--[endif]-->Select the checkbox “Enable” for the “Always encrypt new EBS volumes” setting, and click on the “Update EBS encryption” button.
Enable Encryption With AWS CLI
To enable encryption by default for the AWS account with AWS CLI, the following command can be used:
aws ec2 enable-ebs-encryption-by-default
Additional Notes
The above configuration encrypts new EBS volumes that are created in the account. To encrypt existing volumes, the documentation by AWS can be used as a reference.
Encrypt EBS Snapshots
EBS snapshots are used as backups for EBS volumes, which can be used to recover instance states, launch new instances from the backup, etc. Since EBS snapshots are essentially equivalent to the EBS volumes themselves, ensuring that the snapshots are encrypted as well as their counterpart EBS volumes is necessary.
A good feature in EC2 snapshots is that when a snapshot is created for an encrypted volume, the snapshot is also encrypted by default. This eliminates the need for ever having to encrypt snapshots that were created after enabling the EBS encryption setting that we configured in the previous section on encrypting EBS volumes. That being said, there might be old snapshots that are unencrypted that we need to encrypt, which can be done by creating a copy of the unencrypted snapshot. For the new, copied snapshot we will enable encryption.
Enable Encryption for Snapshot via Console
To enable encryption for an existing unencrypted snapshot via Console, the following steps can be performed:
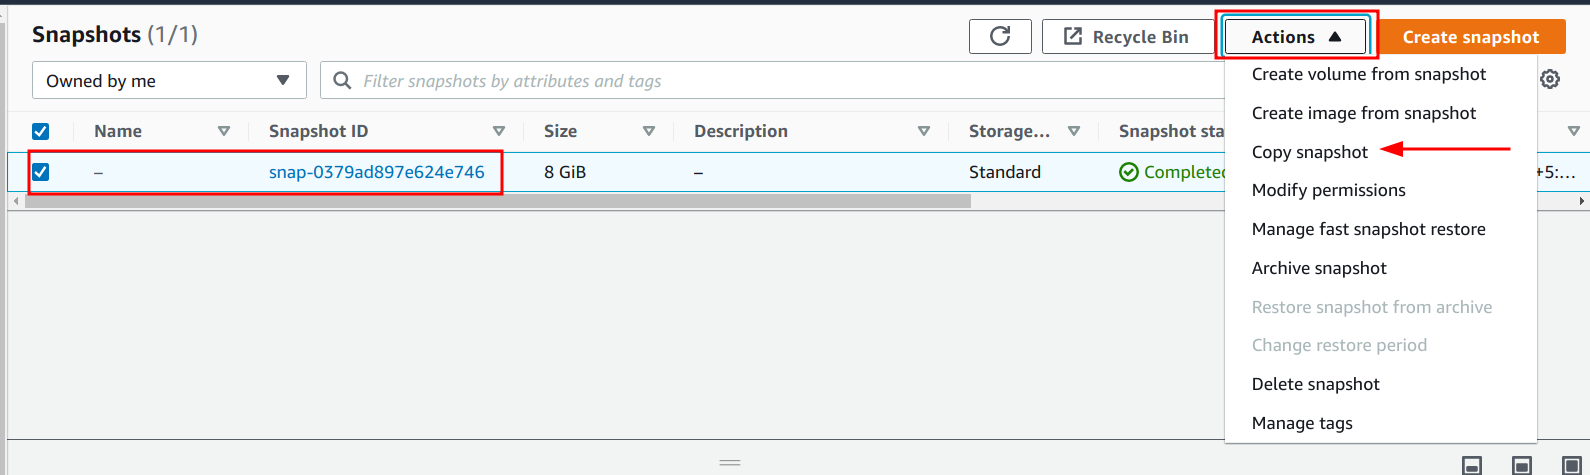
<!--[if !supportLists]-->1. <!--[endif]-->Navigate to the EC2 dashboard.
<!--[if !supportLists]-->2. <!--[endif]-->Click on the “Snapshots” link under the “Elastic Block Storage” sub-menu.
<!--[if !supportLists]-->3. <!--[endif]-->Select the snapshot to make an encrypted copy for, click on the Actions drop-down, and click on the “Copy snapshot” option.
<!--[if !supportLists]-->4. <!--[endif]-->In the “Copy snapshot” page, ensure that the “Encrypt this snapshot” checkbox is selected under the “Encryption” section and click on the “Copy snapshot” button.
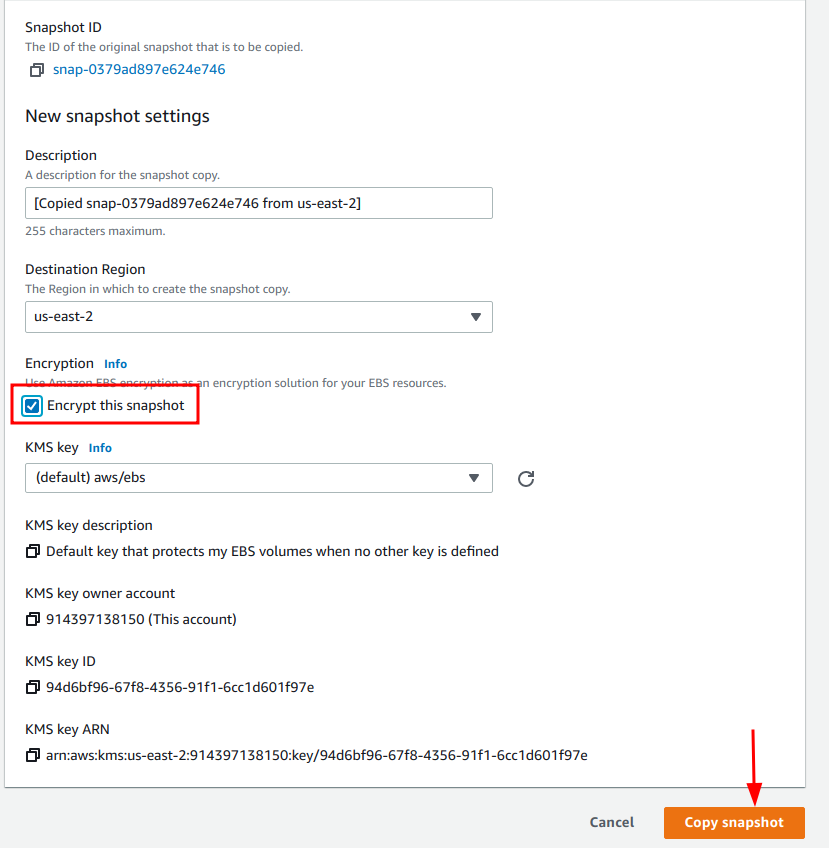
<!--[if !supportLists]-->5. <!--[endif]-->Optionally, a different KMS key can be chosen instead of the default one.
Enable Encryption for Snapshot With AWS CLI
To enable encryption for an existing snapshot with AWS CLI, the following command can be run:
aws ec2 copy-snapshot \--source-region \</source_snapshot_region> --source-snapshot-id \</source_snapshot_id> --encrypted \ --kms-key-id
Use Trusted AMIs
Amazon Machine Images, or AMIs, are launch configuration packages for EC2 instances that need to be specified when launching an instance. These AMIs can be created by anyone and shared with specific AWS accounts or with everyone by making them public. This may lead to a possibility where a malicious AMI may be shared. Thus as a security measure, we should either create and use AMIs ourselves for our instances or use public AMIs that are published by trusted vendors only. One such trusted AMI is the Amazon Linux Image which is created and maintained by Amazon itself. Other images can also be trusted although based on the vendor, not the name, as one can create an image and call it Ubuntu, for example, but the publisher may not actually be associated with the Canonical Group that maintains and releases Ubuntu Operating Systems.
AMIs selected at the time of launching an image are not exactly a configuration associated with the instance, so there are no specific steps to take in the case of this security measure. The AMI being used needs to be vetted for trust before usage, and at the time of launching an instance:
<!--[if !supportLists]-->1. <!--[endif]-->With the console, the AMI needs to be selected from the available list present.
<!--[if !supportLists]-->2. <!--[endif]-->With the AWS CLI, the appropriate AMI ID needs to be supplied to launch the instance.
Utilize IAM Roles To Allow the Instance to Work With AWS Resources
IAM roles are used to delegate permissions to perform actions on AWS resources and perform their required roles. When an IAM role is attached to an EC2 instance, it is called an instance role, and this instance role can be used by the server to perform permitted actions; for example, uploading a local backup to an S3 bucket.
Least-privilege access is a security best practice where we add the exact permission(s) that a role (or in other cases, an IAM user) requires to perform its job. Applying this principle to IAM roles that are attached to instances, only the permissions that are required by the instance to perform its job should be added to the instance role and nothing else. This ensures that in the case of the credentials getting leaked, the damage is minimized.
Configuring the least-privilege permission for an IAM role is very contextual; i.e., it cannot be generalized. Therefore, it goes beyond the scope of this article to provide an exhaustive list of combinations of different possible permissions that can be utilized by an instance and the various use cases.
Use VPCs and Subnets To Isolate Machines
Virtual Private Cloud
Virtual Private Cloud or VPC is an AWS service that allows users to create virtual networks that are isolated logically from one another. Talking specifically about EC2 instances, as an example, we can think of a case where some EC2 instances need to access only internal resources and do not require access to the internet. For such instances, we can create a VPC that does not allow inbound and outbound connections from the internet so the communication can only happen between resources in the same VPC. The documentation from AWS can be used to understand how to create new VPCs.
Create VPC via Console
Perform the following steps to create a new VPC:
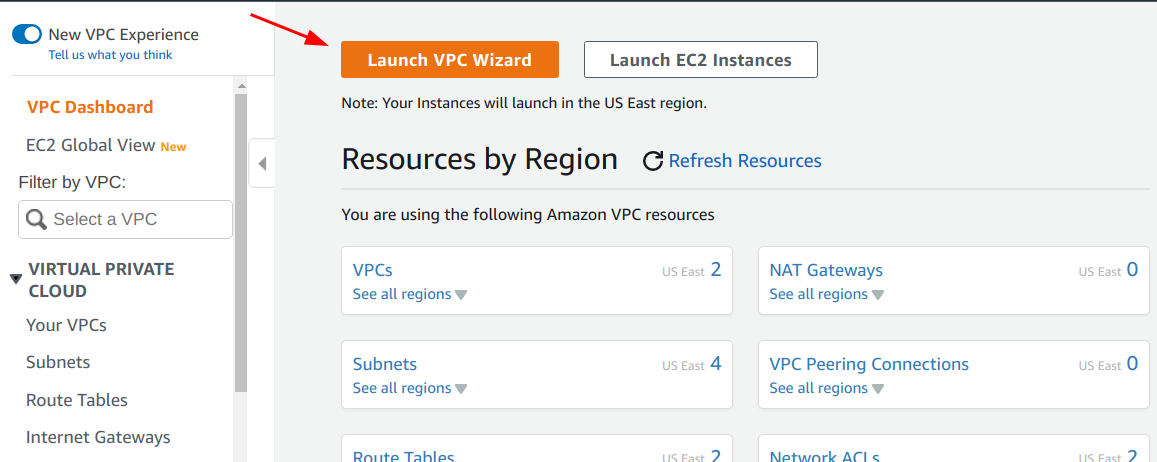
<!--[if !supportLists]-->1. <!--[endif]-->Navigate to the VPC management page.
<!--[if !supportLists]-->2. <!--[endif]-->Click on the “Launch VPC Wizard” button.
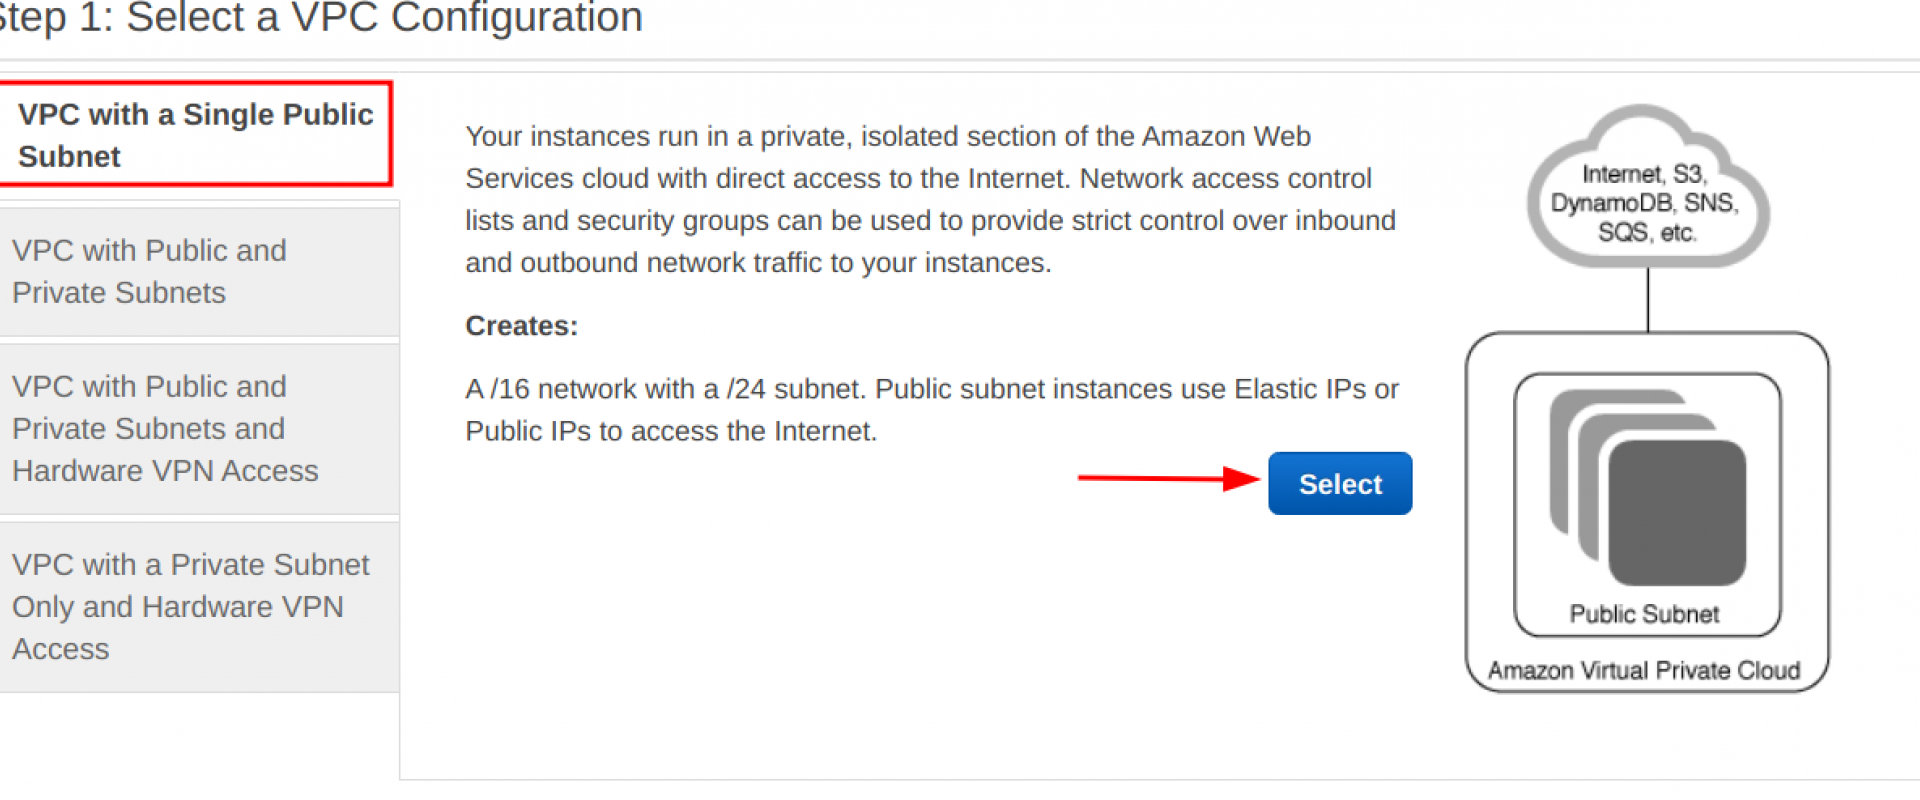
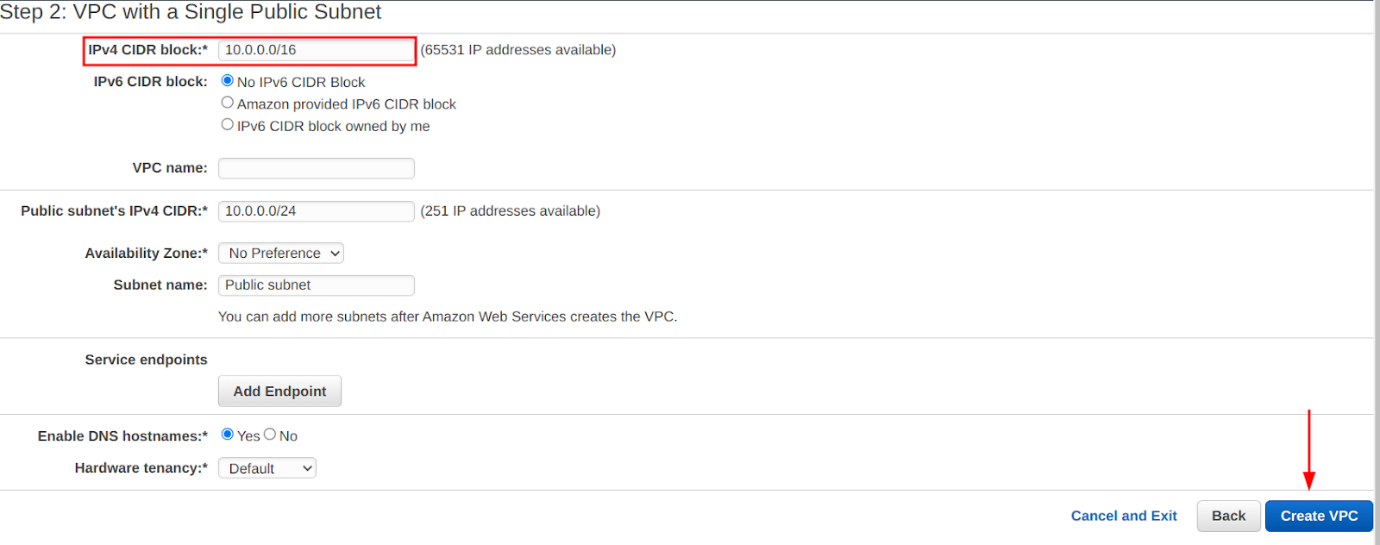
<!--[if !supportLists]-->3. <!--[endif]-->Choose the “VPC with a Single Public Subnet” option and click on the “Select” button. We can add more subnets later if we want to.

<!--[if !supportLists]-->4. <!--[endif]-->Provide the IPv4 CIDR block for the VPC and click on the “Create VPC” button.
Create VPC With AWS CLI
Run the following command to create a new VPC with the specified CIDR being 192.168.0.0/16:
aws ec2 create-vpc --cidr-block 192.168.0.0/16
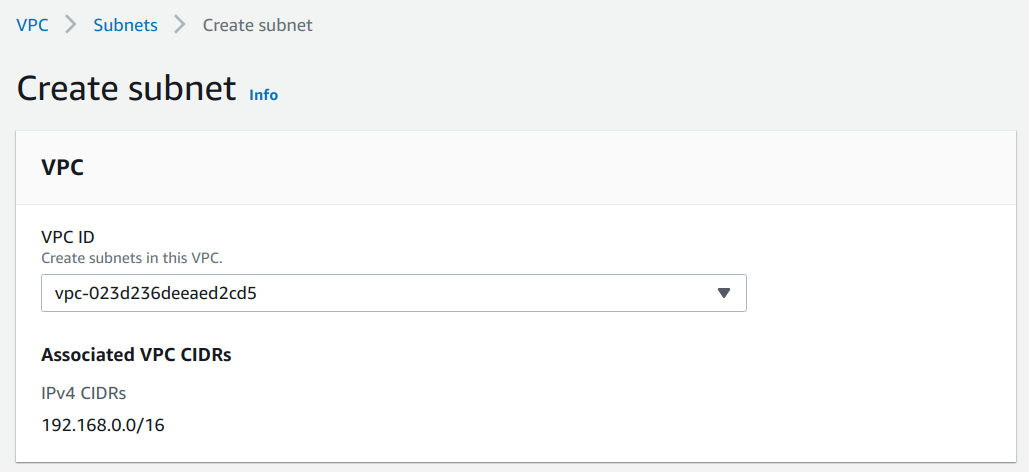
Subnet
Subnets are sub-components within a VPC that can further segregate resources within smaller virtual networks. For example, a VPC created with CIDR block 192.168.0.0/16 can have subnets 192.168.1.0/24 and 192.168.2.0/24 where both subnets are within the same VPC but isolated from each other.
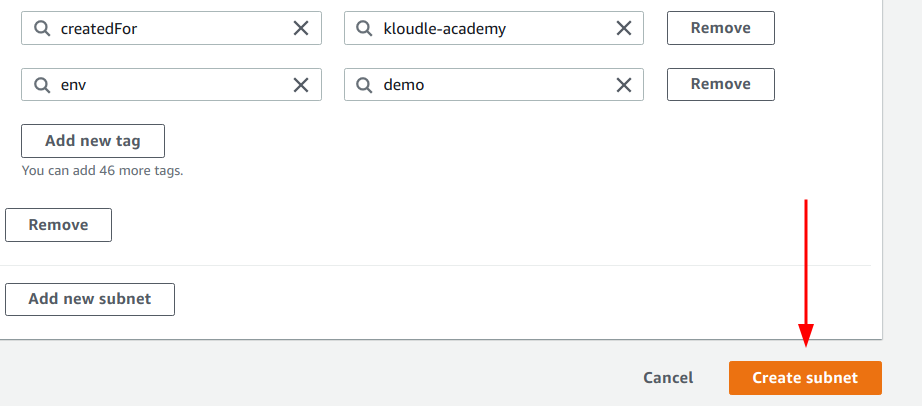
Create Subnet via Console
Perform the following steps to create a new VPC:
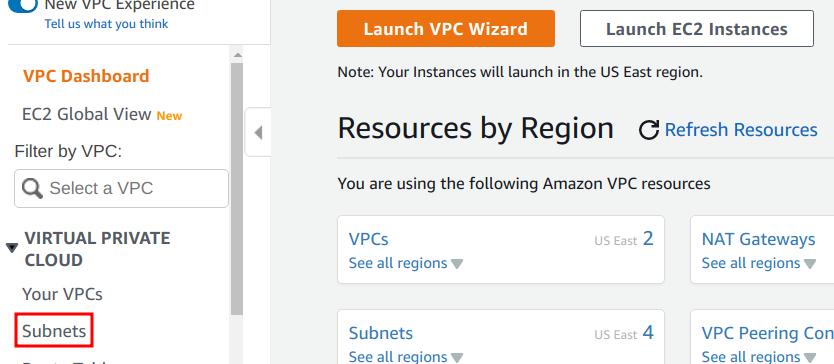
<!--[if !supportLists]-->1. <!--[endif]-->Navigate to the VPC management page.
<!--[if !supportLists]-->2. <!--[endif]-->Click on the “Subnets” link for the “Virtual Private Cloud” menu.
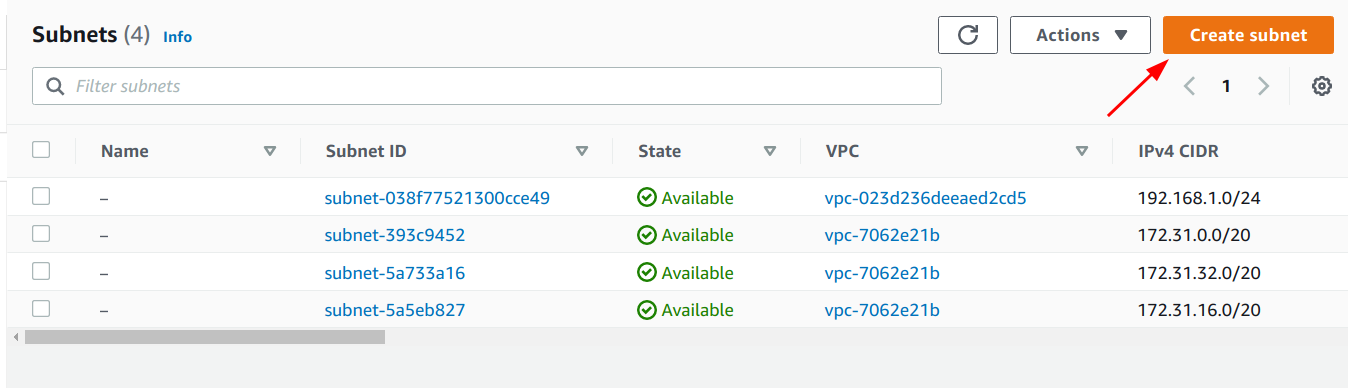
<!--[if !supportLists]-->3. <!--[endif]-->Click on the “Create subnet” button.
<!--[if !supportLists]-->4. <!--[endif]-->Select the VPC to create the Subnet inside.
<!--[if !supportLists]-->5. <!--[endif]-->Add the CIDR block for the subnet and optionally a name and tags.
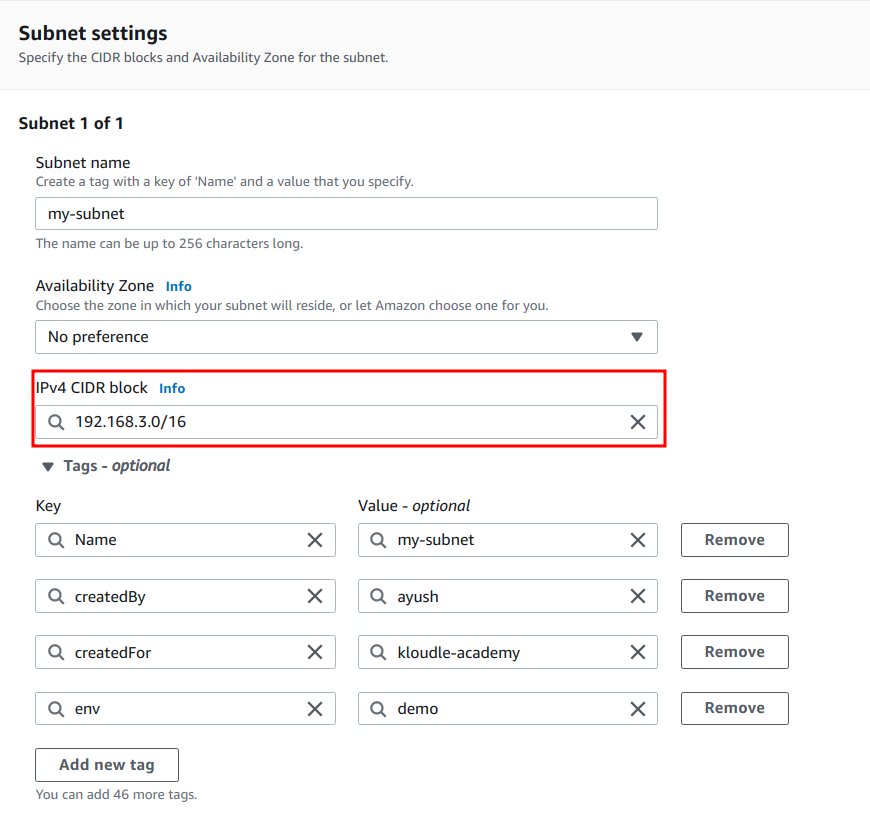
<!--[if !supportLists]-->6. <!--[endif]-->Lastly, click on the “Create subnet” button.
Create Subnet With AWS CLI
Run the following command to create a new Subnet within CIDR block 192.168.1.0/24:
aws ec2 create-subnet --vpc-id --cidr-block 192.168.1.0/24
Enable Detailed Monitoring for Instances
EC2 instances have basic monitoring in place by default from the time of launch. Basic monitoring is good-to-have, but more often than not, it falls inadequate. Here comes detailed monitoring for EC2 instances such as CPU credit metrics, instance metrics, and so forth.
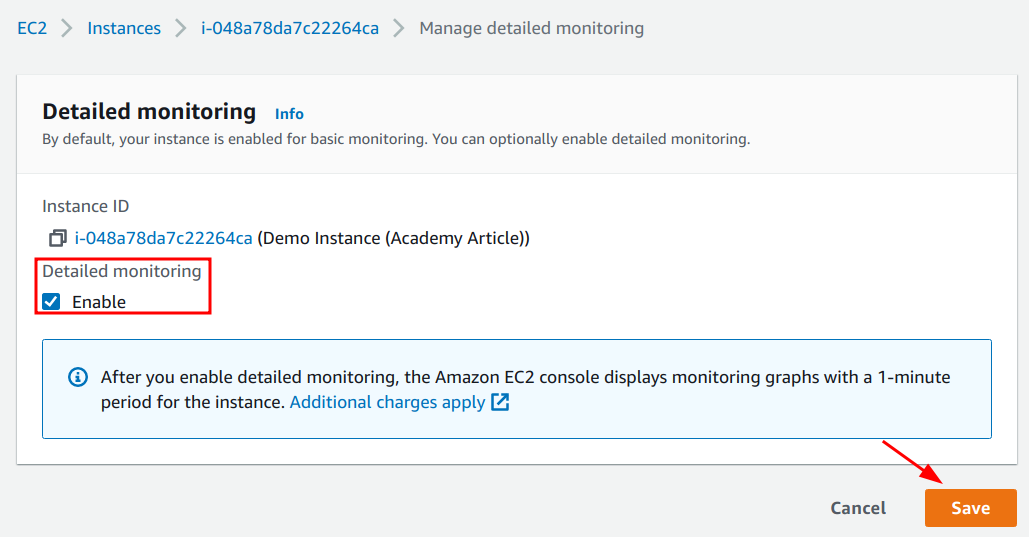
Enable Detailed Monitoring via Console
Perform the following steps to enable detailed monitoring for EC2 instances via console:
<!--[if !supportLists]-->1. <!--[endif]-->Navigate to the EC2 Dashboard.
<!--[if !supportLists]-->2. <!--[endif]-->Select the instance where detailed monitoring needs to be enabled. Click on the “Actions” drop-down menu, and choose the “Manage detailed monitoring option” under the “Monitor and troubleshoot” sub-menu.

<!--[if !supportLists]-->3. <!--[endif]-->Ensure that the “Enable” checkbox is selected and click on the “Save” button.
Enable Detailed Monitoring With AWS CLI
Run the following AWS CLI command to enable detailed monitoring for existing instances:
aws ec2 monitor-instances --instance-ids
Run the following AWS CLI command to enable detailed monitoring when launching a new instance:
aws ec2 run-instances --image-id --monitoring Enabled=true #Amongst other options/flags
Conclusion
EC2 is an extensively utilized service offered by AWS to run our applications and so much more. With its list of extensive usability comes a long list of options to apply to these instances, which can lead to misconfigurations or the use of insecure default configurations.
In this article, we took a look at the various security measures we can take to secure our EC2 instances, some by applying settings directly on the EC2 instances like using trusted AMIs or enabling IMDSv2, and some that align with the instance tangentially, such as using VPCs to isolate various instances from each other or encrypting the EBS volumes and snapshots. In all these cases we saw why these configurations are highly recommended to use, if not outright mandatory to apply.
We Provide consulting, implementation, and management services on DevOps, DevSecOps, Cloud, Automated Ops, Microservices, Infrastructure, and Security
Services offered by us: https://www.zippyops.com/services
Our Products: https://www.zippyops.com/products
Our Solutions: https://www.zippyops.com/solutions
For Demo, videos check out YouTube Playlist: https://www.youtube.com/watch?v=4FYvPooN_Tg&list=PLCJ3JpanNyCfXlHahZhYgJH9-rV6ouPro
If this seems interesting, please email us at [email protected] for a call.
Relevant Blogs:
Five Minute Cloud Lambda Function
Cloud Migration Manual: The Adjustment to SaaS Model
Amazon EKS Case Studies: How Are Businesses Benefiting from EKS?
Backups Are Moving Away from On-Premises Boxes
Recent Comments
No comments
Leave a Comment
We will be happy to hear what you think about this post