Kubernetes deployment in Jenkins pipeline

Here is a quick and full example to build a docker image from private GitHub repo and push it to docker hub with declarative pipeline in Jenkins
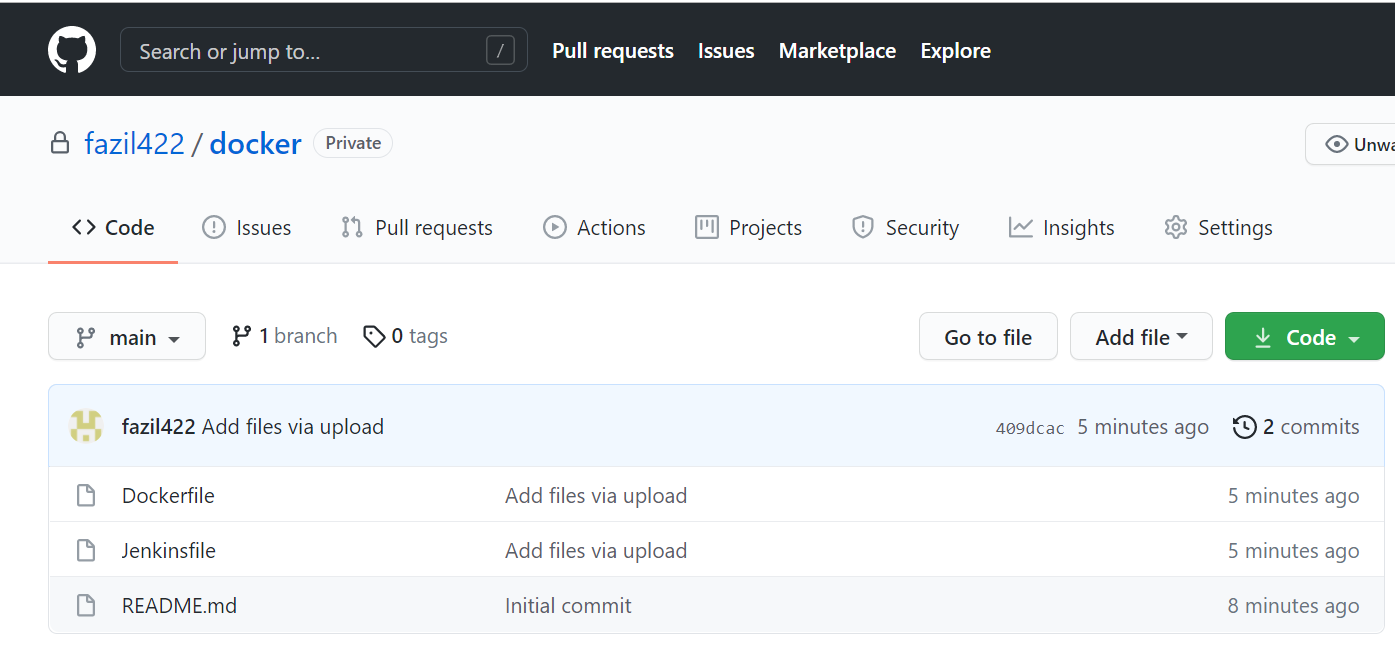
create a sample repo with basic Dockerfile and Jenkinsfile
Configure Jenkins
Ensure that we installed docker engine on Jenkins instance and git, docker plugins
Install Docker-CE on Ubuntu 18 from https://docs.docker.com/engine/install/ubuntu/
After that, allow Jenkins users to access the docker socket.
# sudo usermod -aG docker Jenkins
# sudo systemctl restart Jenkins
Test our docker access with Jenkins user
$ sudo su - Jenkins
$ docker ps
CONTAINER ID IMAGE COMMAND CREATED STATUS PORTS NAMES
Creating Your First Jenkins Pipeline
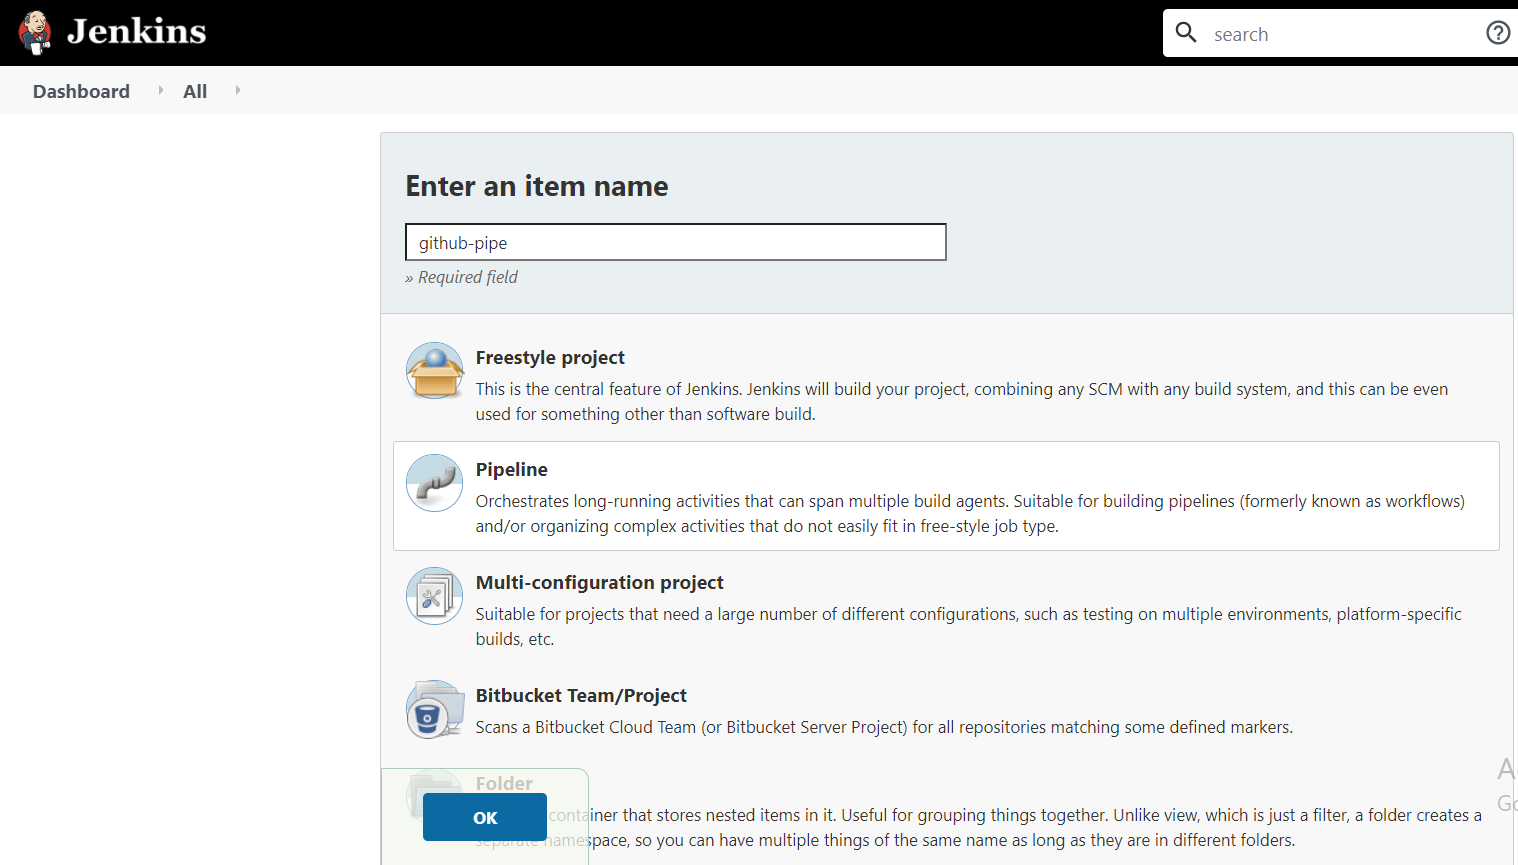
Now, we are ready to create our first Pipeline. On Jenkins go to New Item > Pipeline, type the name you want for this Pipeline project, and then click OK.
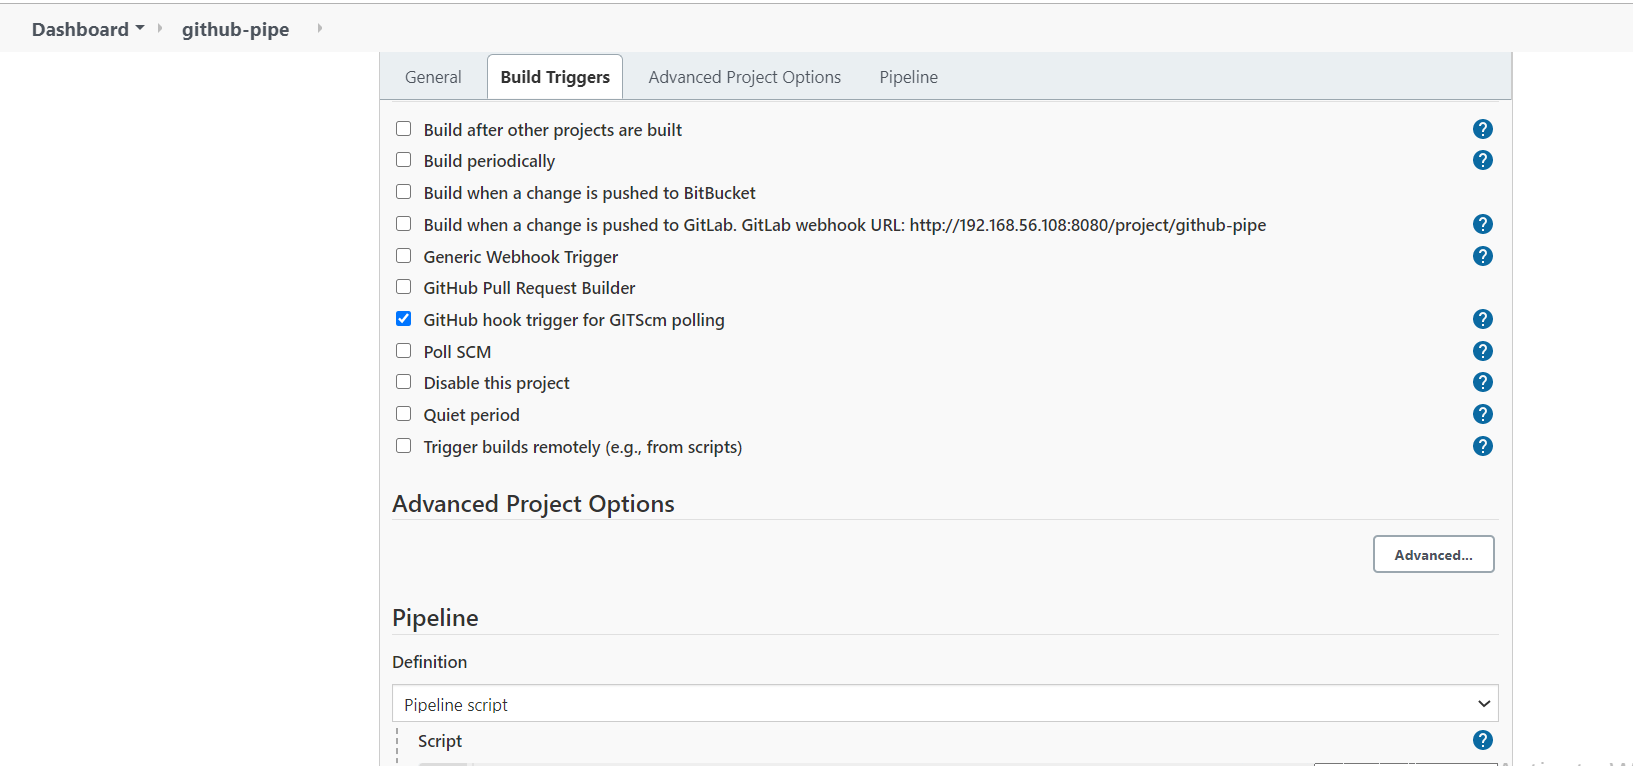
Enable GitHub hook trigger for GITScm polling at Build Triggers
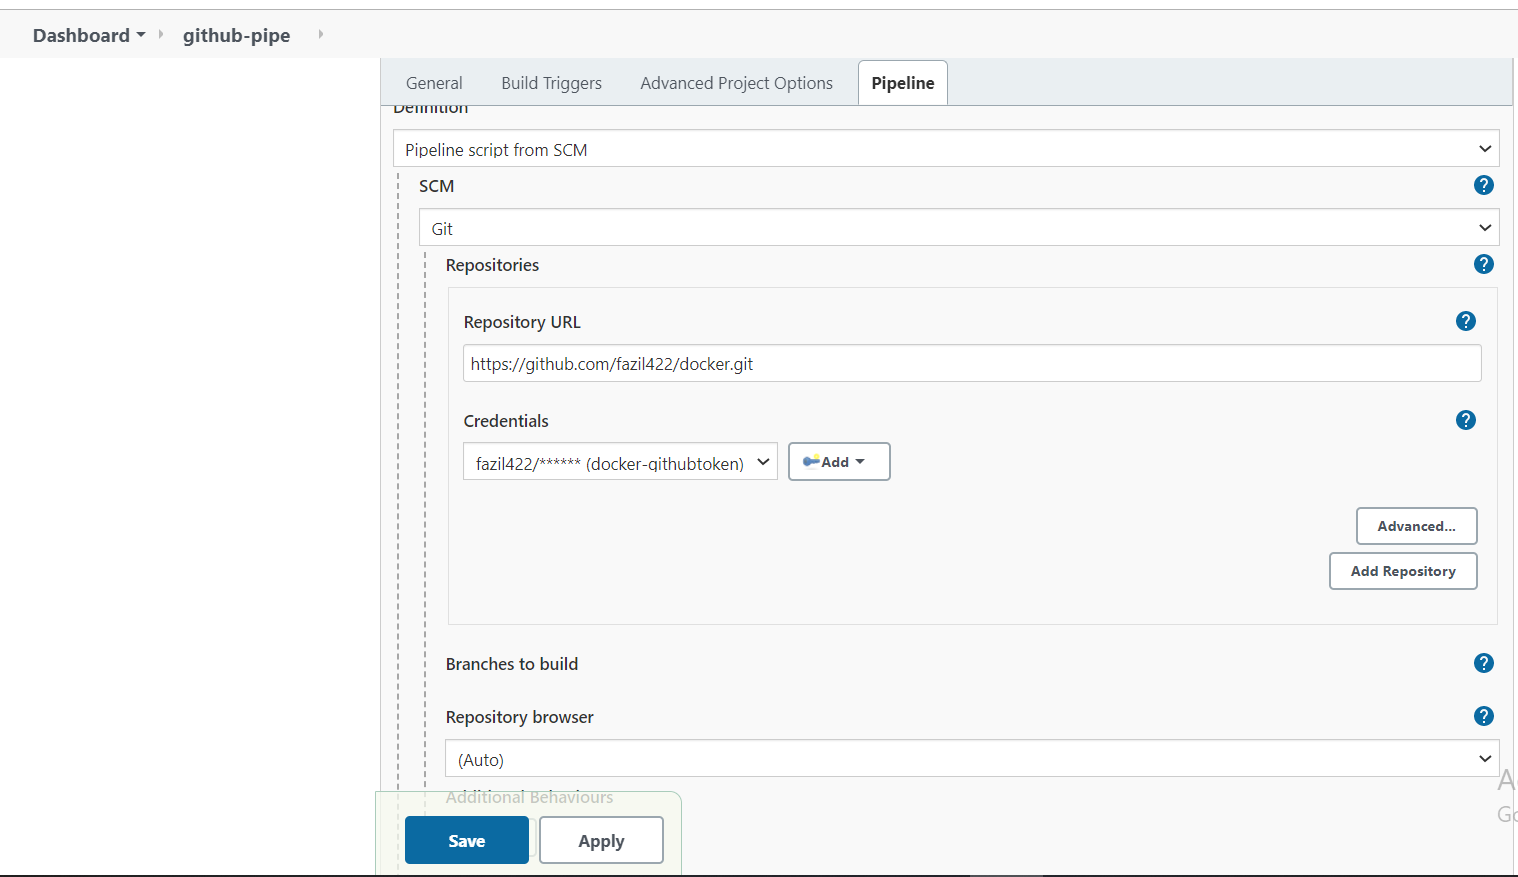
And Configure Pipeline
Choose Definition Pipeline script from SCM
SCM: Git
Credentials: The one we created earlier. You can create the credentials in this section too.
Branch to build: This is just a test build I chose the master origin/master
Script Path: Where you keep Jenkinsfile. We keep it in the repo base directory. If this is in the subpath, please specify here.
here is the content of the Jenkinsfile
Just update something in the repo and push the changes
git add . ; git commit -m "Jenkins" ; git push
If everything is fine, we can check our consol output
Create Jenkins pipeline on Kubernetes
Finally, we may create the Jenkins pipeline for our application. It consists of six steps. Firstly, we clone the source code repository from GitHub. We use the default Jenkins agent for it. In the next three stages, we use the maven agent. In the second stage, we build the application. Then, we run JUnit tests. After that, we build a Docker image in the “dockless” mode using the Maven Jib plugin. In the last two stages, we can take an advantage of the Kubernetes Continuous Deploy plugin. We use already created kubeconfig credentials, and deployment-template.yaml file from the source code. We just need to set the PIPELINE_NAMESPACE environment variable.
pipeline {
environment {
imagename = "zippyops01/javaapp-training"
registryCredential = 'dockerhub'
dockerImage = ''
}
agent any
tools {
git 'Default'
maven 'mavan-demo'
dockerTool 'docker'
}
stages {
stage('Checkout Source') {
steps {
checkout([$class: 'GitSCM', branches: [[name: '*/master']], extensions: [], userRemoteConfigs: [[credentialsId: 'my-git', url: 'http://gitlab.zippyops.com/demo/javaapp-deployment.git']]])
}
}
stage("Build") {
steps {
script {
sh """
mvn clean install
"""
}
}
}
stage("Docker Build image") {
steps {
script {
dockerImage = docker.build imagename
}
}
}
stage("Docker Push image") {
steps {
script {
docker.withRegistry('', registryCredential ) {
dockerImage.push("${env.BUILD_ID}")
}
}
}
}
stage('Remove Unused docker image') {
steps{
sh "docker rmi $imagename:$BUILD_NUMBER"
}
}
stage('Deploy App to kuberentes') {
steps {
script {
sh "sed -i s/latest/$BUILD_NUMBER/g $WORKSPACE/deploy.yml"
kubernetesDeploy configs: 'deploy.yml', kubeConfig: [path: 'kubernetes_build'], kubeconfigId: 'kubeconfig', secretName: '', ssh: [sshCredentialsId: '*', sshServer: ''], textCredentials: [certificateAuthorityData: '', clientCertificateData: '', clientKeyData: '', serverUrl: 'https://']
}
}
}
}
}
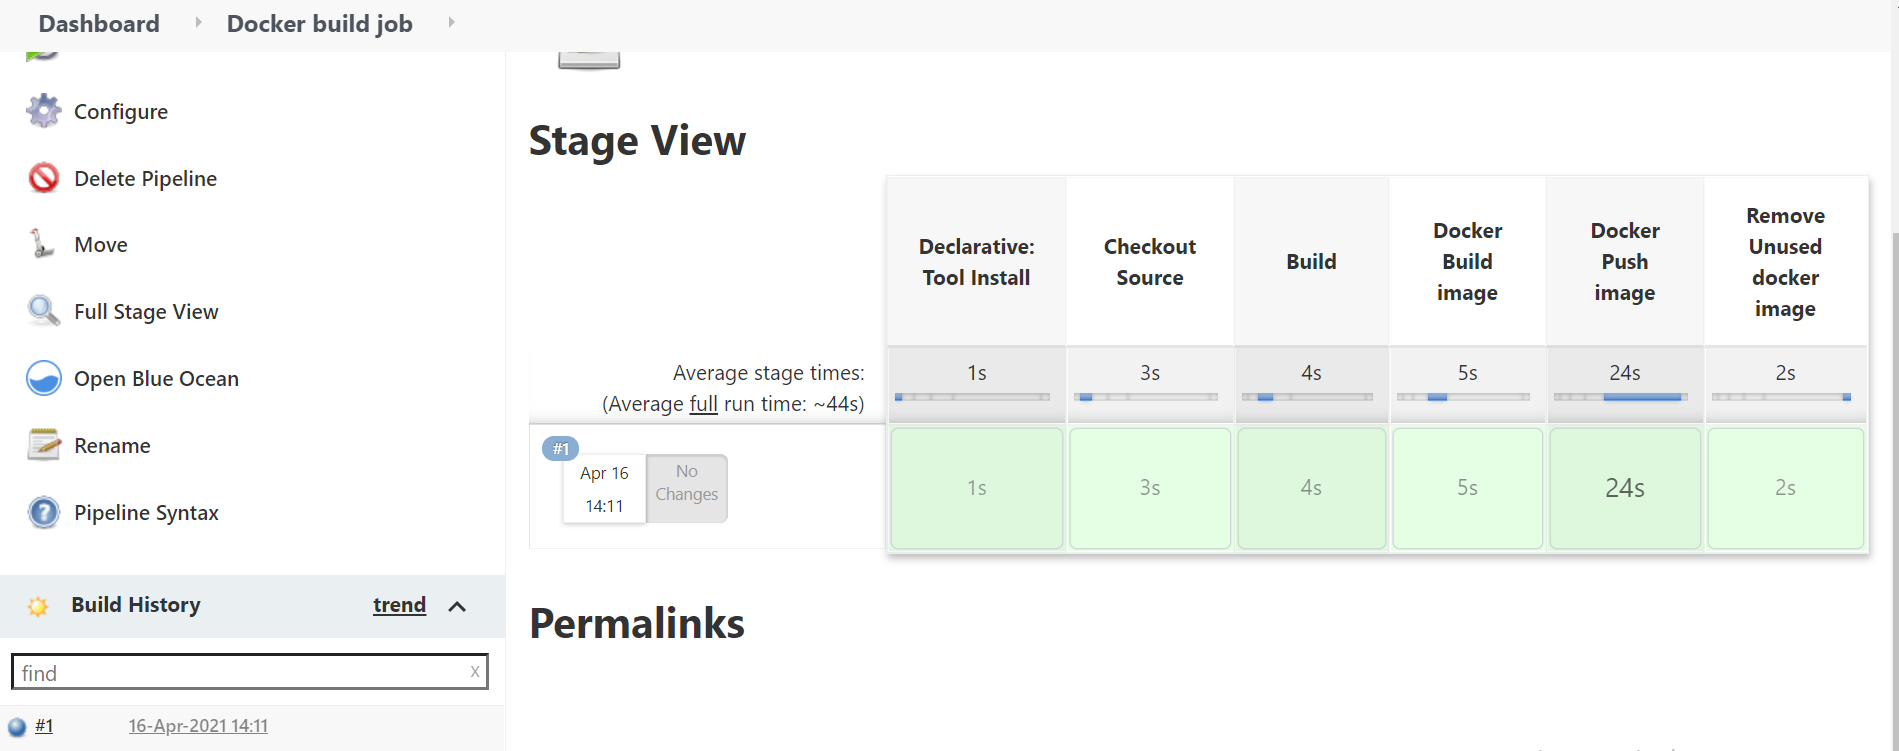
Finally, let’s run our test pipeline.
Recent Comments
No comments
Leave a Comment
We will be happy to hear what you think about this post