Zabbix adding Linux and windows nodes

Installing the Zabbix agent
The first thing that must be done is the installation of the Zabbix agent. Log in to the remote machine you want to be monitored by Zabbix. Download a file that will install the repository with the command:
#wget http://repo.zabbix.com/zabbix/3.4/ubuntu/pool/main/z/zabbix-release/zabbix-release_3.4-1+xenial_all.deb
Install that file with the command:
#sudo dpkg -i zabbix*all.deb
Install the agent with the following commands:
#sudo apt-get update
#sudo apt-get install zabbix-agent
Add the pre-shared Zabbix key
Zabbix supports certificate-based encryption. However, for simplicity's sake, we'll use the pre-shared keys to secure our connection between agent and server. To do this, generate a pre-shared key with the command:
#sudo sh -c "openssl rand -hex 32 > /etc/zabbix/zabbix_agentd.psk"
#cat /etc/zabbix/zabbix_agentd.psk
Configure the Zabbix agent
Next comes the configuration of the Zabbix agent. All configuration options are found in a single file. Issue the command:
#sudo vi /etc/zabbix/zabbix_agentd.conf
Server=127.0.0.1
Change that to:
Server=ZABBIX_MONITOR
Note ZABBIX_MONITOR is the IP address of the Zabbix Monitor server.
Scroll down until you see the TLSConnect section. At the bottom of that section, add the following:
#TLSConnect=psk
Next locate the TLSAccept section and add the following to the bottom
#TLSConnect=psk
locate the TLSPSKIdentity section and add the following to the bottom
#TLSPSKIdentity=PSK 001
locate the TLSPSKFile section and add the following to the bottom:
#TLSPSKFile=/etc/zabbix/zabbix_agentd.psk
Restart and enable the Zabbix agent
#systemctl start zabbix-agent
#systemctl enable zabbix-agent
Adding the host to the Zabbix Monitor
*Log into your Zabbix server and click on the Configuration tab and then the Hosts tab. Click the Create host button near the top right corner. change the Hostname and IP ADDRESS sections to match the information for your remote server.
*Add the host to a group (select the Linux Servers group and click the left-pointing arrow). Next, click on the Templates tab and type Template OS Linux in the search field, and then click Add to include this template. Click on the Encryption tab and select PSK for both Connections to host and Connections from the host
*In the PSK Identity section, enter PSK 001, and in the PSK field, paste the PSK key you copied earlier. Finally, click the Add (or Update) button to add the host.
The remote host should show up with everything green (indicating all is well and the connection is encrypted
Adding windows host
Download Zabbix Agent for Windows Server
The official https://www.zabbix.com/download_agents download the Zabbix Window’s agent.
This will download it in the ‘Downloads’ folder as shown.

Edit the Zabbix configuration file
We need to make a few changes to the Zabbix configuration file for the Zabbix agent to communicate with the Zabbix server. Therefore, open the Zabbix configuration file – zabbix.agentd.conf – and modify the parameters as shown
Server=
ServerActive=
Hostname=
Save the changes and exit the file.
Install and start Zabbix Agent on Windows server
With all the configurations in order, run command prompt as administrator and install Zabbix using the syntax as shown
#C:\>C:\Users\windows\Downloads\bin\zabbix_agentd.exe --config
#C:\>C:\Users\windows\Downloads\bin\zabbix_agentd.exe --config
To start Zabbix, use the syntax:
#C:\> {full system path to zabbix_agentd.exe) –start
The command is
#C:\>C:\Users\windows\Downloads\bin\zabbix_agentd.exe --start
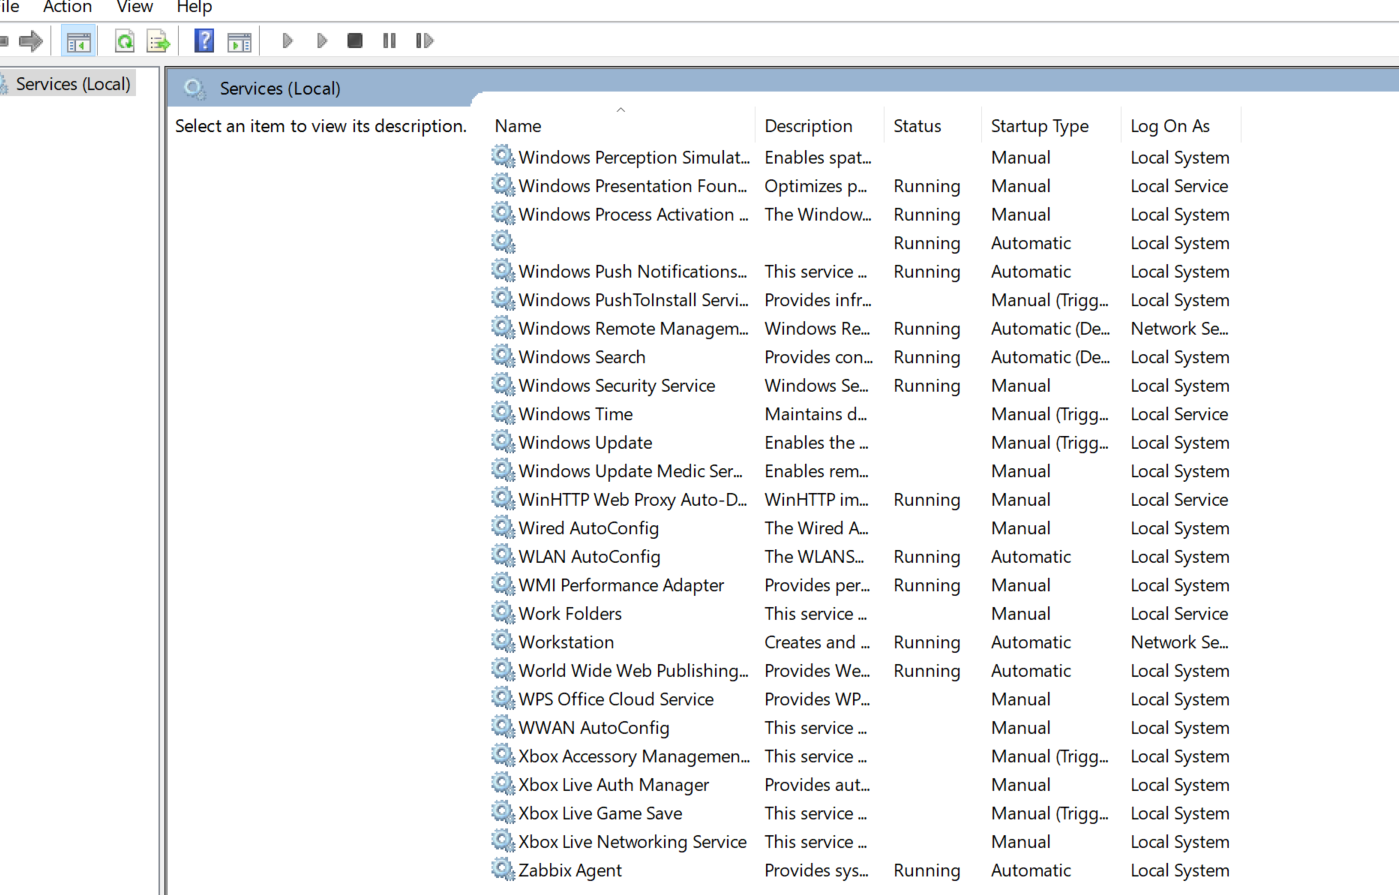
To confirm that the Zabbix agent is running, head out to the ‘Windows Services’ application and confirm that the Zabbix agent is up and running.
Configure Windows firewall for Zabbix Agent
By default, the Windows firewall is enabled and blocks incoming and outgoing connections. We are therefore going to make a few changes to allow traffic from the Windows Server host to the Zabbix server.
we are going to allow ICMP protocol for the Zabbix server to establish network communication with the Windows host and report any errors when they occur. Therefore, run Windows Powershell with Administrative privileges and execute the command as shown:
#netsh advfirewall firewall add rule name="ICMP Allow incoming V4 echo request" protocol="icmpv4:8,any" dir=in action=allow
Allows port 10050 – which is the default port that Zabbix listens to – on the firewall.
#netsh advfirewall firewall add rule name="Open Port 10050" dir=in action=allow protocol=TCP localport=10050
The Zabbix agent should be sending system metrics to the Zabbix server.
Add a Windows host on Zabbix Server
*To add a Windows host, go to Configuration –> Host –> Create Host
*On the next screen, fill out the Windows host details such as hostname, visible name, and IP address.
*For the ‘Groups’ section, click on the ‘Select button and click on the ‘Templates/Operating system’ option.
*Next, click on the ‘Templates’ tab on the menu and click ‘Template OS Windows by Zabbix agent. Finally, click on the ‘Select’ button.
*On the dashboard, check the Windows host listed as shown below. Note that the state is indicated ‘Enabled’ with the Zabbix icon ‘ZBX’ in green color.
*To graph the metrics associated with the Windows host system, click on ‘Monitoring’ –> ‘Hosts’. Click on the Windows host and select ‘Graphs’.
Finally, the Zabbix server will start graphing the system metrics shipped by the Zabbix agent which is residing on the Windows server host system. There are various metrics that you can monitor including network Interface statistics, CPU usage and utilization, Disk space usage, and Memory utilization to mention a few.
Relevant Blogs:
Zabbix Installation and configuration
Recent Comments
No comments
Leave a Comment
We will be happy to hear what you think about this post