Cloud Migration: Azure Blob Storage Static Website
In this article, we will look at how on-perm front-end applications migrate to the cloud using static website hosting Azure blob storage.
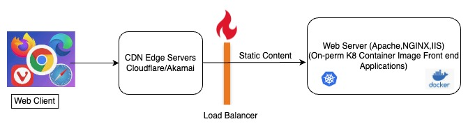
Problem Statement: Legacy Front-End Applications On-Premises Architecture
Currently, a lot of front-end applications are built and deployed using on-prem Docker Kubernetes container images, which are hosted on web servers (Apache/NGINX/IIS, etc.)
The problem with this approach is that the workload container cluster must run constantly, which increases the compute and replication cost, infrastructure maintenance, and lack of recovery.
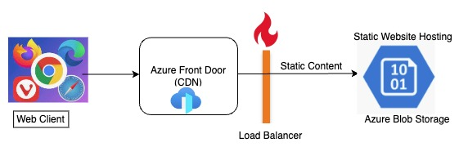
Solution: Modern Front End Applications Azure Cloud Blob Storage Architecture
Modern static front-end applications are migrating to the cloud, and where here, the Azure blob storage is cheaper in computing and infrastructure(hardware + Networking) costs.
We performed a cost estimation assessment of Azure Blob vs. on-prem container for around 300+ front-end applications. As a business result, 40% cost savings on infrastructure in Azure blob cloud storage. This approach does not need virtual machine containers/clusters, web servers, and cost per usage.
Azure Storage Account Creation
A storage account is an Azure Resource Manager resource. Resource Manager is the deployment and management service for Azure
Every Resource Manager resource, including an Azure storage account, must belong to an Azure resource group. A resource group is a logical container for grouping your Azure services. When you create a storage account, you have the option to either create a new resource group or use an existing resource group. This how-to shows how to create a new resource group.
To create an Azure storage account with the Azure portal, follow these steps:
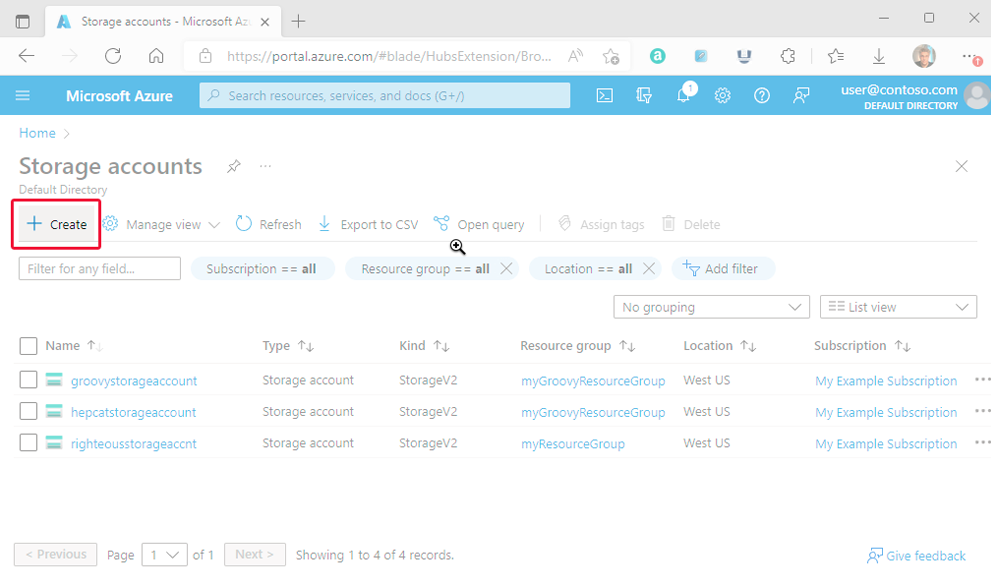
1. From the left portal menu, select Storage Accounts to display a list of your storage accounts. If the portal menu isn't visible, select the menu button to toggle it on.
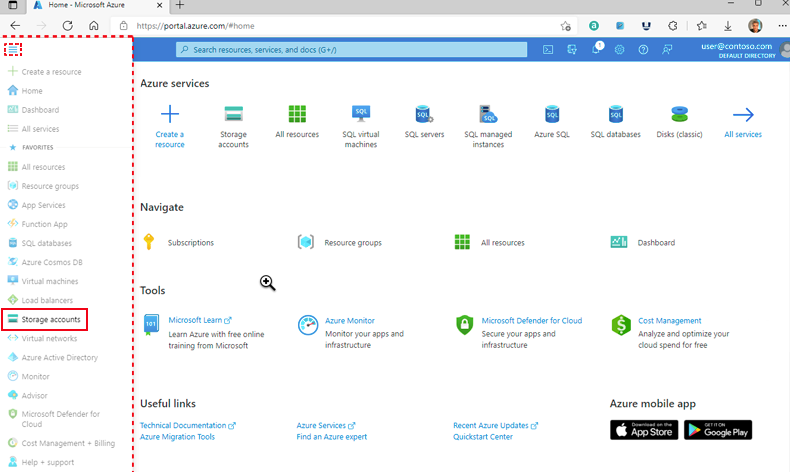
2. On the Storage accounts page, select Create.
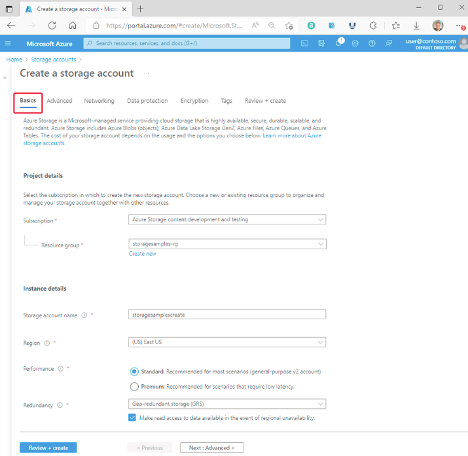
3. On the Basics tab, provide the essential information for your storage account. After you complete the Basics tab, you can choose to customize your new storage account further by setting options on the other tabs, or you can select Review + Create to accept the default options and proceed to validate and create the account.
Host Static Website in Azure Blob Storage
Azure storage static websites are a feature that allows you to host static website content (HTML, CSS, JavaScript, and image files) directly from a storage container named $web. This is a great option for scenarios for client-side rendering websites where you don't need a web server to render content.
Let's do a walkthrough to enable the static website and upload the static website in $web container blob storage.
Enable Static Website Hosting
Static website hosting is a feature that you must enable on the storage account.
1. Sign in to the Azure portal to get started.
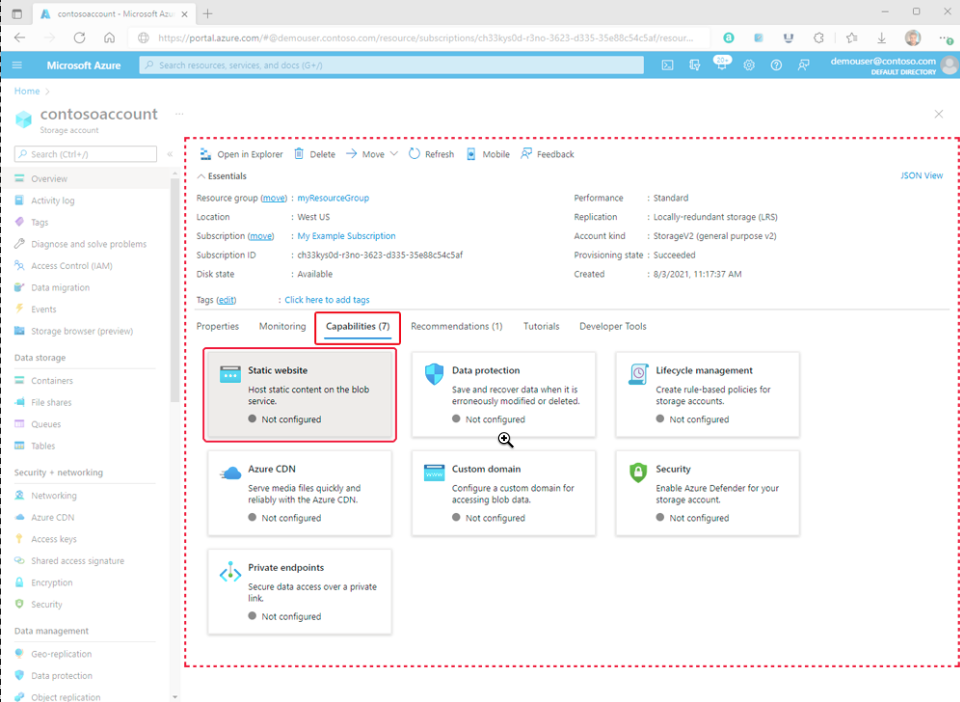
2. Locate your storage account and select it to display the account's Overview pane.
3. In the Overview pane, select the Capabilities tab. Next, select Static Website to display the configuration page for the static website.
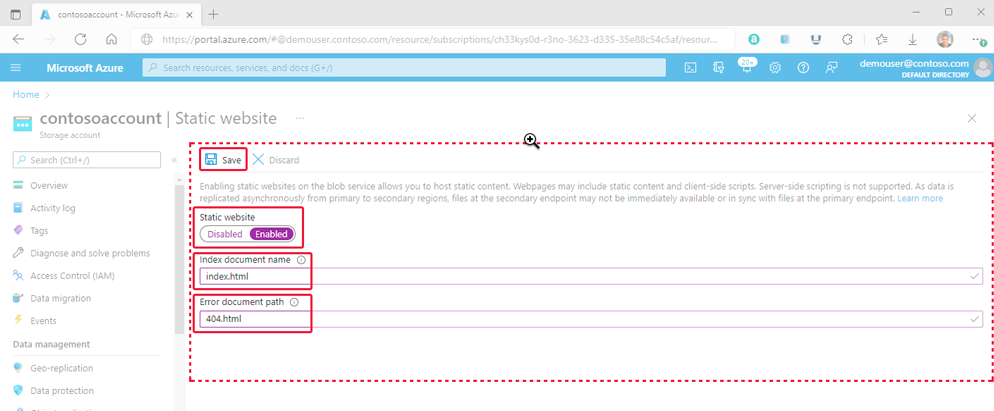
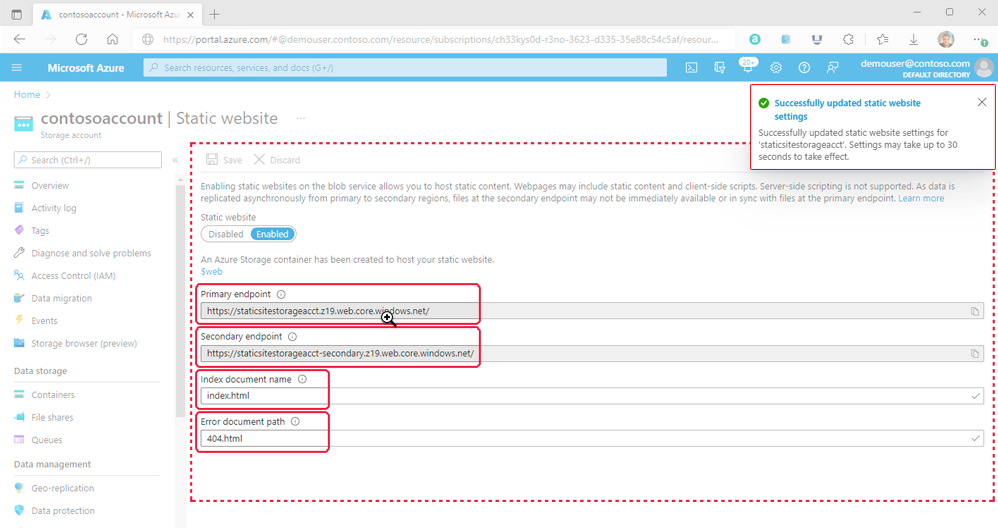
4. Select Enabled to enable static website hosting for the storage account.
5. In the Index document name field, specify a default index page (For example: index.html). The default index page is displayed when a user navigates to the root of your static website.
6. In the Error document path field, specify a default error page (For example, 404.html). The default error page is displayed when a user attempts to navigate to a page that does not exist in your static website.
7. Click Save to finish the static site configuration.
8. A confirmation message is displayed. Your static website endpoints and other configuration information are shown within the Overview pane.
Upload Static Website
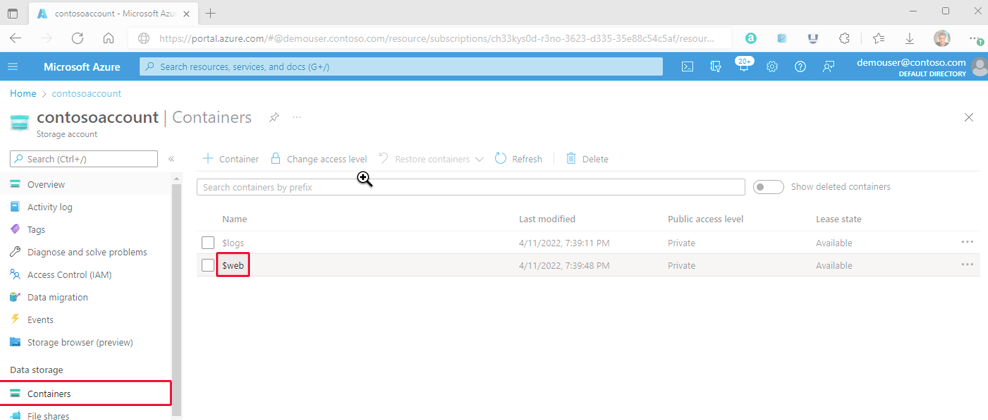
The following instructions show you how to upload files by using the Azure portal. You could also use AzCopy, PowerShell, CLI, or any custom applications, such as the Jenkin pipeline, that can upload files to the $web container of your account. In the Azure portal, navigate to the storage account containing your static website. Select Containers in the left navigation pane to display the list of containers.
1. In the Containers pane, select the $web container to open the container's Overview pane.
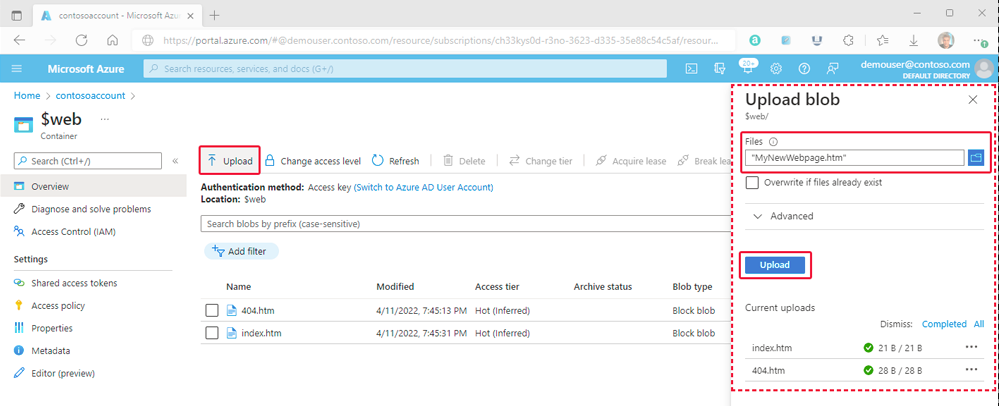
3. In the Overview pane, select the Upload icon to open the Upload blob pane. Next, select the Files field within the Upload blob pane to open the file browser. Navigate to the file you want to upload, select it, and then select Open to populate the Files field. Optionally, select the Overwrite checkbox if files already exist.
Here, you can upload as files or an entire static website folder.
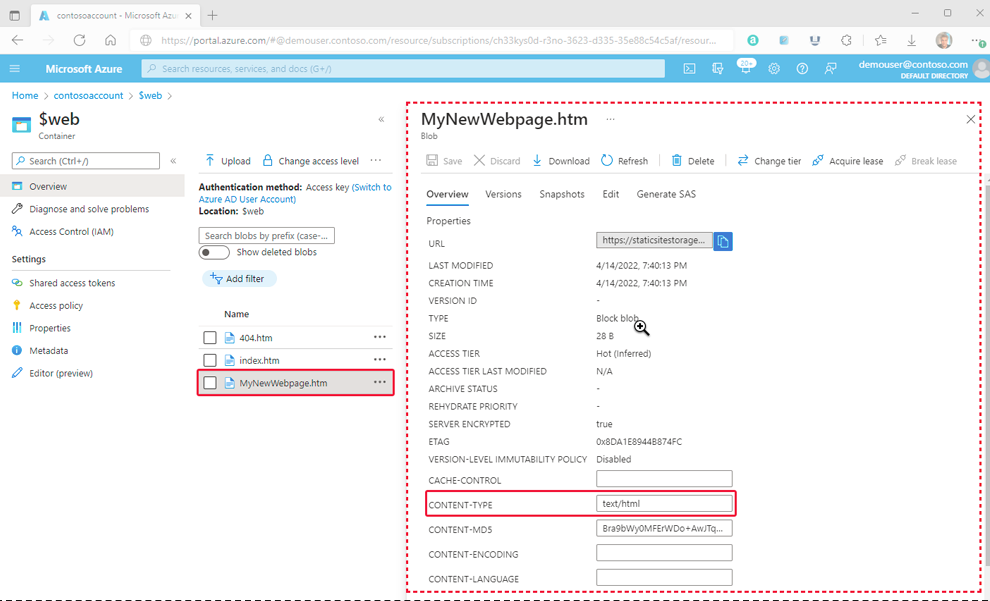
4. If you intend for the browser to display the contents of the file, make sure that the content type of that file is set to text/html. To verify this, select the name of the blob you uploaded in the previous step to open its Overview pane. Ensure that the value is set within the CONTENT-TYPE property field.
Find the Website URL
You can view the pages of your site from a browser by using the public URL of the website.
To Enhance security, you can apply the Private link to the public URL of the website to secure the network connection.
In the pane that appears beside the account overview page of your storage account, select Static Website. The URL of your site appears in the Primary endpoint field.
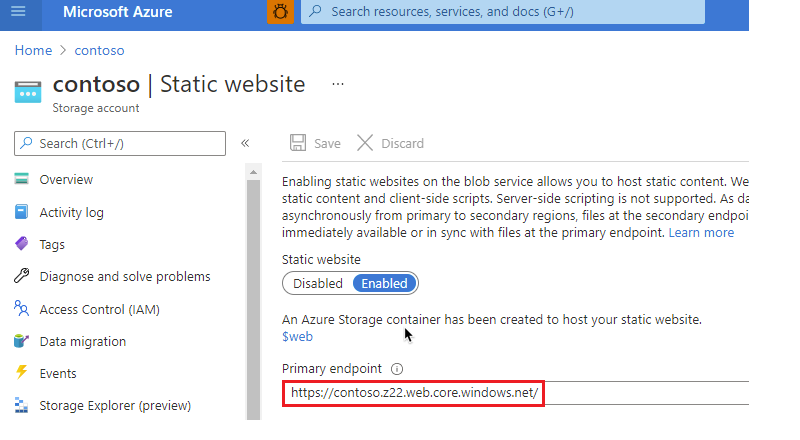
Ideally, we can’t expose the Azure primary endpoint as a public website URL; using the company domain web server can configure the rewrite logic to access the Azure primary/private endpoint URL.
** We can’t configure the http/https headers through Azure blob storage. Azure CDN/Front door helps this case.
Azure Front Door
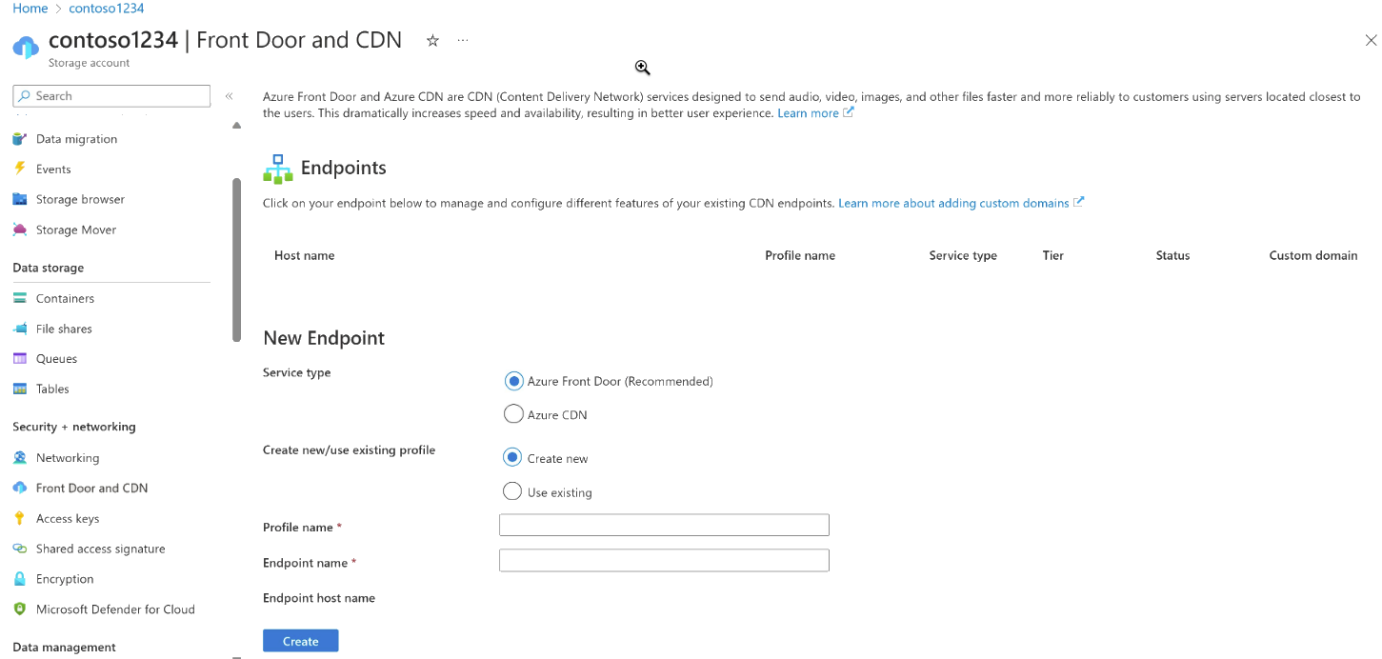
To configure the web server headers' capability, such as preflight CORS, setting cache-expiry, content-type, access-control-origin, and security headers through the Azure front door.
1. In the Azure portal, choose a storage account, select the type “Azure Front Door,” and create a profile.
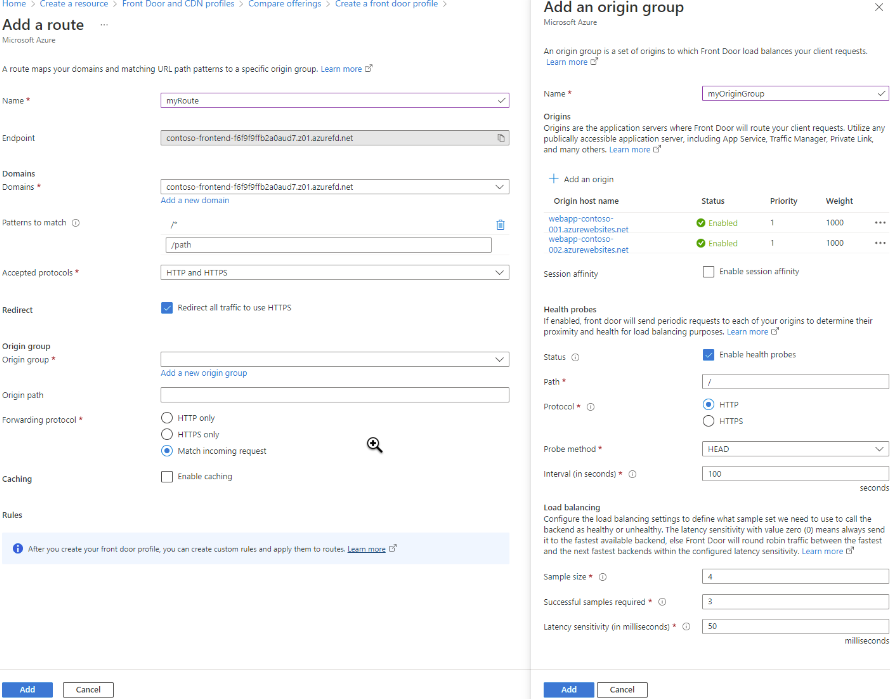
2. Add route to the front door profile.
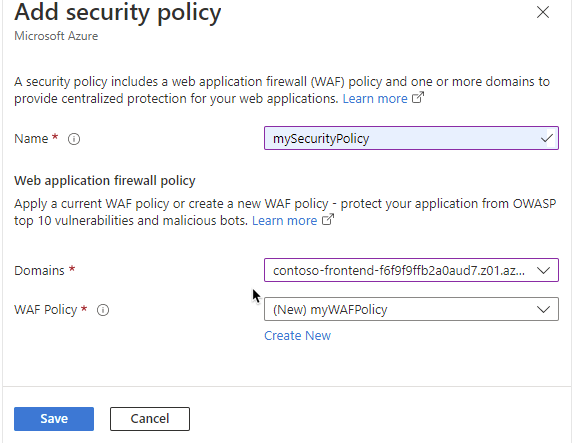
3. Add security policy to the front door domain
4. To deploy the Azure Front Door profile, select Review + Create and then Create. The configurations propagate to all edge locations in a few minutes.
Conclusion
In conclusion, this is an in-depth guide to help create storage accounts and static websites using the $web blob container and access static through Azure Front door (CDN) services.
We Provide consulting, implementation, and management services on DevOps, DevSecOps, DataOps, Cloud, Automated Ops, Microservices, Infrastructure, and Security
Services offered by us: https://www.zippyops.com/services
Our Products: https://www.zippyops.com/products
Our Solutions: https://www.zippyops.com/solutions
For Demo, videos check out YouTube Playlist: https://www.youtube.com/watch?v=4FYvPooN_Tg&list=PLCJ3JpanNyCfXlHahZhYgJH9-rV6ouPro
If this seems interesting, please email us at [email protected] for a call.
Relevant Blogs:
Security Best Practices for Docker Images
Logging and Monitoring in a Docker Environment
Top Reporting Accurate Metrics Within Containers
Tutorial: Installing and Using Prometheus in Kubernetes
Recent Comments
No comments
Leave a Comment
We will be happy to hear what you think about this post